
In CO-SENDER you can create, rename, or delete folders to keep your campaigns organized in a way that makes sense to you.
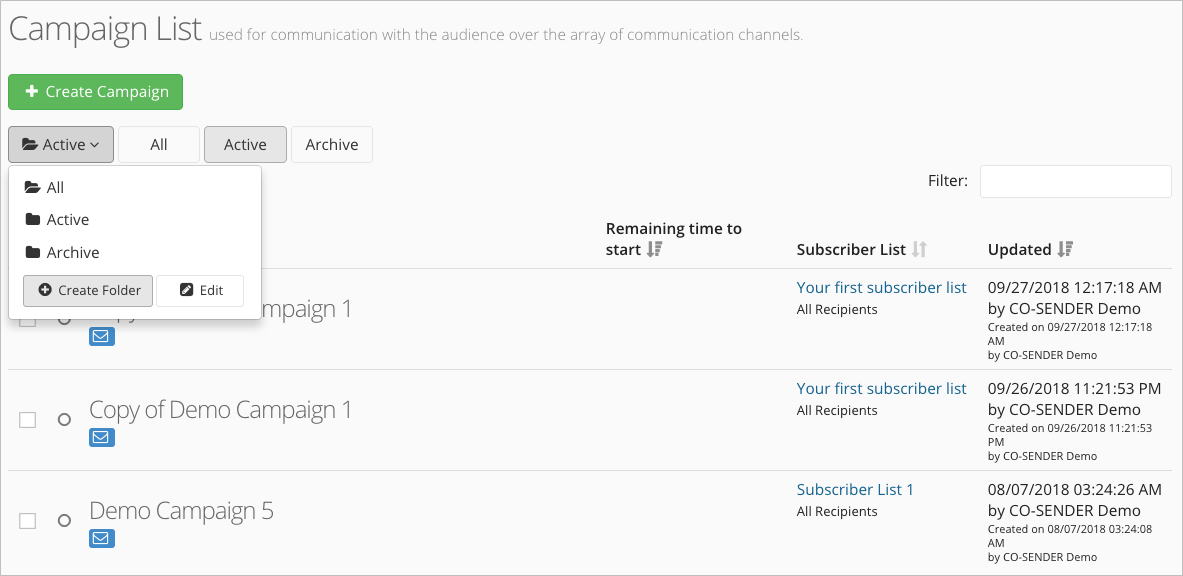
- Navigate to Campaigns.
- Click on the “Active” folder button on the top left to reveal the drop-down menu.
- Click “Create folder” button.
- Give your folder a name and confirm this by clicking “Create” button.
- Done! You can find the newly created folder among your other folders.
Did you misspell the folder name? Don’t worry, it’s very easy to change any folder name, just repeat the first two steps above and click on “Edit” button instead. Now simply click on the edit pencil symbol next to a folder and rename it. You can also delete the folder by clicking on the bin symbol instead.
To move your campaign to a desired folder follow the following steps:
- Navigate to Campaigns and find the campaign you want to move.
- Select the check-box next to it.
- Click “Move To” button on the top right and select the folder from the drop-down menu where you want to move your campaign.
- Done! The campaign was moved to your chosen folder.
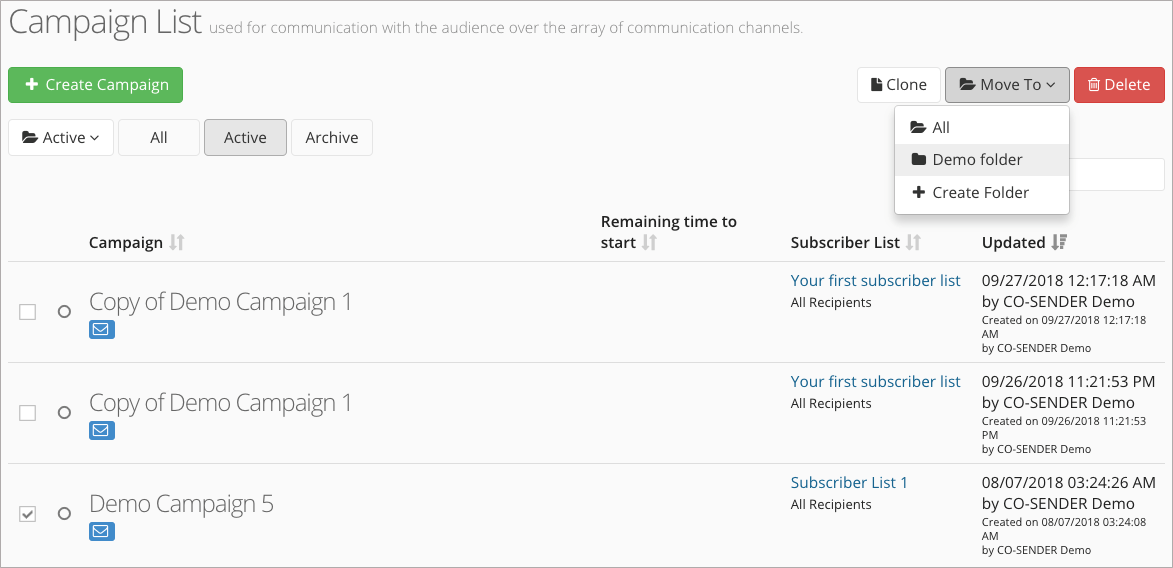
Please note that you can select and move multiple campaigns simultaneously. Also note that when you move campaigns into separate folders, your Reports window will still show the full campaign list.