
Using API
This page will help you to get started with sending Email and SMS campaign messages via API.
API Overview
API is a way for you to send messages to your customers from your systems (CRM, CMS, e-commerce, etc.) using CO-SENDER in different communication channels – Email or SMS. You don‘t need to import your subscriber lists into CO-SENDER, or update them. You can send messages to your customers directly from your systems.
General process
Just a couple of steps and you can send messages using API:
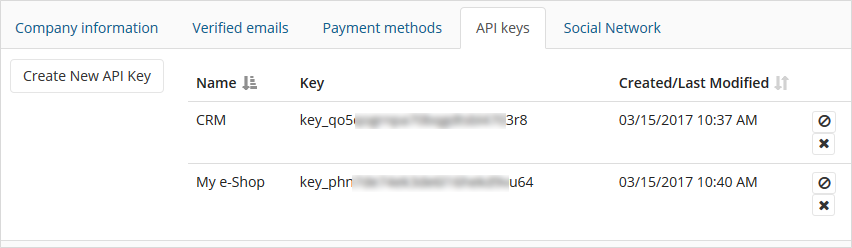
- Go to Account Settings and create an API key in the “API Keys” tab – you can have as many API keys as you need;
- Create Email API or SMS API campaign. Note that you can personalize message content for your recipients by using parameters (such as customer’s first name, last name, email address, or any other additional fields you add);
- Activate campaign and start sending via API! Use campaign code that is created at Campaign Review step and is always visible in campaign report.
REST clients
To use our API you could use one of the following awesome apps:
- Postman (Windows, MacOS)
- Insomnia (MacOS, Windows, Linux)
- Paw (MacOS)
- REST Easy Firefox Add-on (Firefox)
Base URL
Submit all requests to the base URL. All the requests are submitted thorough HTTP POST, PUT, DELETE or GET method. We strongly recommend you to submit all requests to CO-SENDER API over HTTPS so the traffic is encrypted and the privacy is ensured.
Base URL: https://api.co-sender.com/v1
Encoding
All request parameters, headers and body should be UTF-8 encoded.
Content-Type & Accept header
CO-SENDER API supports JSON Content-Types and Accept criteria that should be specified in the header. If the Content-Type is not specified you will receive a General error. JSON is returned by all API responses, including errors.
Content-Type header: application/json
Accept header: application/json
Authentication
Generate API key
Authenticate your account when using the API by including your secret API key in the request. You can manage your API keys in the Account Settings page. Your API keys carry many privileges, so be sure to keep them secret! Do not share your secret API keys in publicly accessible areas such as GitHub, client-side code, and so forth.
Warning! Keep your API key secret!
Authorization header
Authentication to the API is performed via HTTP Basic Auth. Provide your API key as the basic auth password value and username must always be api.
Example:
Username: api
Password: key_76p6defc2f5e2shq0t4ullbu2j

Base64 encoded string: 'YXBpOmtleV83NnA2ZGVmYzJmNWUyc2hxMHQ0dWxsYnUyag=='

Authorization header: 'Basic YXBpOmtleV83NnA2ZGVmYzJmNWUyc2hxMHQ0dWxsYnUyag=='
Example Request using username:password parameter:
$ curl 'https://api.co-sender.com/v1/messages' -i -u api:'<api_key>'
Example Request using Authorization header:
$ curl 'https://api.co-sender.com/v1/messages' -i -H 'Authorization: Basic YXBpOmtleV83NnA2ZGVmYzJmNWUyc2hxMHQ0dWxsYnUyag=='
API requests without authentication will fail. Requests that require authentication will return
404 Not Found, instead of403 Forbidden, in some places. This is to prevent the accidental leakage of private repositories to unauthorized users.
Methods
Send messages POST /v1/messages
To send a message or a batch of messages create a HTTP POST request to https://api.co-sender.com/v1/messages
Your Header should contain authorization and content type:
- Authorization:
Basic YXBpOmtleV83NnA2ZGVmYzJmNWUyc2hxMHQ0dWxsYnUyag== - Content-Type:
application/json
Request
Request body contains the message you wish to send with recipient and text parameters.
A sample JSON request for Email recipient is shown below:
POST /v1/messages HTTP/1.1
Host: api.co-sender.com
Authorization: Basic YXBpOmtleV83NnA2ZGVmYzJmNWUyc2hxMHQ0dWxsYnUyag==
Content-Type: application/json
Accept: application/json

{
  "code": "u5t69i3mlib87",
  "messages" : [
    {
      "recipient" : "email@domain.com",
      "parameters" : {
        "first_name" : "John",
        "order_id" : "ABC12345",
        "anything_else_here" : "Doe"
      }
    }
  ]
}
Similarly, JSON request for SMS recipient would look like this:
{
  "code": "b5t78i3uyib12",
  "messages" : [
    {
      "recipient" : "13108713613",
      "parameters" : {
        "first_name" : "John",
        "order_id" : "ABC12345",
        "anything_else_here" : "Doe"
      }
    }
  ]
}
Request parameters:
| Path | Required | Type | Description |
|---|---|---|---|
code |
✓ | String |
Campaign code |
messages |
✓ | Array |
Array of message objects |
messages[0..10].recipient |
✓ | String |
Recipient address (email or mobile phone number) |
messages[0..10].parameters |
Map |
Key-value pairs representing message parameters |
Message parameters are optional but must be provided in order to fill-in placeholders in the campaign content text. In some cases we can derive useful information about the subscriber from the recipient address and provide it for you. Here is the list of parameters:
%recipient.first_name%– First name of subscriber%recipient.last_name%– Last name of subscriber%recipient.email%– Subscriber’s email address%recipient.phone_number%– Subscriber’s phone number${permission_reminder}– Campaign’s permission reminder text${unsubscribe}– Unsubscribe link${company_address}– Company address
You can also pass your own ${permission_reminder}, ${unsubscribe} and ${company_address} parameters and they will override default values.
You can add additional parameters in the request. These parameters must be also added to the campaign message content in the %recipient.any_parameter_here% format as described in the Creating Campaign with API section. These parameters must have the same name as they are named in the message content. For example your request could look like this:
{
  "code": "u5t69i3mlib87",
  "messages" : [
    {
      "recipient" : "email@domain.com",
      "parameters" : {
        "date_of_birth" : "1988-03-28",
        "occupation" : "Developer"
      }
    }
  ]
}
where date_of_birth and occupation are your own custom parameters that you enter in your campaign content as %recipient.date_of_birth% and %recipient.occupation% accordingly.
Keep your parameters short and easy to understand.
If you pass parameters that are not in the message content – they will be ignored. If you do not pass parameters that are defined in the message content – we will leave placeholder text in the generated message. For example:
Your message text could look like this:
Hi %recipient.name% %recipient.surname%. You received a package with id: %recipient.parcel_id%. The order was placed on %recipient.date%.
You pass these placeholders with your request:
"name"– John"surname"– Doe"parcel_id"– US12345ABC
The message we will sent will be:
Hi John Doe. You received a package with id: US12345ABC. The order was placed on %recipient.date%.
As you can see, you forgot to pass “date” parameter that you defined in your message content – therefore the placeholder text was left unused in the generated message.
Response
After the HTTP request was submitted to the CO-SENDER API, you will get a response containing some useful information. If everything went well, it should provide an 200 OK response with message details in the response body.
Response:
{
  "code": "u5t69i3mlib87",
  "messages": [
    {
      "messageId": "9555c510-be0c-11e6-b257-1d3531107724",
      "recipient": "email@domain.com",
      "status": "OK",
      "message": "OK"
    }
  ]
}
| Path | Type | Description |
|---|---|---|
code |
String |
Campaign code |
messages |
Array |
Array of message responses |
messages[0..10].messageId |
String |
Created message ID |
messages[0..10].recipient |
String |
Message recipient |
messages[0..10].status |
String |
Response status code: OK, WARNING, ERROR |
messages[0..10].message |
String |
Response message text |
Message response status indicates the status of the message. OK and WARNING messages were sent successfully, but messages with ERROR status were rejected. Please look at the response message text to get more information why the message sending failed.
Error response codes
In case of failure please refer to Error codes section for more information about the errors.
| Error code | HTTP status code | Description |
|---|---|---|
| 2003 | 400 | Invalid recipient phone number |
| 2004 | 400 | Invalid recipient email |
| 2101 | 400 | Campaign you are trying to send message for is inactive |
| 2102 | 400 | Account message limit is reached |
| 1000 | 500 | Internal system error |
Examples
Bellow you will find some examples using different languages
curl:
$ curl 'https://api.co-sender.com/v1/messages' -i -X POST -H 'Content-Type: application/json' -u api:<api_key> -d '{"code":"u5t69i3mlib87","messages":[{"recipient":"email@domain.com"}]}'
PHP:
$request = new HttpRequest();
$request->setUrl('https://api.co-sender.com/v1/messages');
$request->setMethod(HTTP_METH_POST);

$request->setHeaders(array(
  'Authorization' => 'Basic ' . base64_encode('api:<api_key>')
  'content-type' => 'application/json'
));

$request->setBody('{\"code\": \"u5t69i3mlib87\",\"messages\":[{\"recipient\":\"email@domain.com\"}]}');

try {
  $response = $request->send();

  echo $response->getBody();
} catch (HttpException $ex) {
  echo $ex;
}
Javascript:
var api_key = "your_api_key"
var settings = {
  "async": true,
  "beforeSend": function (xhr) {
      xhr.setRequestHeader ("Authorization", "Basic " + btoa("api:" + api_key));
  },
  "crossDomain": true,
  "url": "https://api.co-sender.com/v1/messages",
  "method": "POST",
  "headers": {
    "content-type": "application/json",
  },
  "processData": false,
  "data": "{\"code\": \"u5t69i3mlib87\",\"messages\":[{\"recipient\":\"email@domain.com\"}]}"
}

$.ajax(settings).done(function (response) {
  console.log(response);
});
Error codes
CO-SENDER uses conventional HTTP response codes to indicate the success or failure of an API request along with API specific error codes.
Here is how an error response looks like:
{
  "type": "CLIENT",
  "code": 2101,
  "status": 400,
  "timestamp": "2016-12-12T08:58:53.809+0000",
  "error": "Bad Request",
  "message": "Campaign is inactive"
}
| Path | Type | Description |
|---|---|---|
type |
Enum |
Indicates error type. Can be CLIENT or SYSTEM. |
code |
int |
Error code |
status |
int |
HTTP status code (see next section for more detailed description on HTTP status codes) |
timestamp |
String |
Date and time when the error has occurred (based on the ISO-8601 standard). Format: yyyy-MM-dd'T'HH:mm:ss.SSSZ |
error |
String |
Abstract error description (typically HTTP status message) |
message |
String |
Error message |
HTTP status code summary
In general, codes in the 2xx range indicate success, codes in the 4xx range indicate an error that failed given the information provided (e.g., a required parameter was omitted, a limit reached, etc.), and codes in the 5xx range indicate an error with CO-SENDER’s servers (these are rare).
| Code | Text | Description |
|---|---|---|
| 200 | OK | Everything worked as expected. |
| 400 | Bad Request | The request was unacceptable, often due to missing a required parameter. |
| 401 | Unauthorized | No valid API key provided. |
| 402 | Request Failed | The parameters were valid but the request failed. |
| 404 | Not Found | The requested resource doesn’t exist. |
| 409 | Conflict | The request conflicts with another request (perhaps due to using the same idempotent key). |
| 429 | Too Many Requests | Too many requests hit the API too quickly. We recommend an exponential backoff of your requests. |
| 50x | Server Errors | Something went wrong on Stripe’s end. (These are rare.) |
CO-SENDER error codes
| Code | Description |
|---|---|
| 1000 | Internal system error |
| 2003 | Invalid recipient phone number |
| 2004 | Invalid recipient email |
| 2101 | Campaign you are trying to send message for is inactive |
| 2102 | Account message limit is reached |
If only there were more cleevr people like you!