
Click Here and watch Importing Subscribers video tutorial
To import a file with subscriber data, go to Subscribers, select a subscriber list to which you want to import new subscribers, and then press “Import Subscribers” button which will take you to subscribers import window.
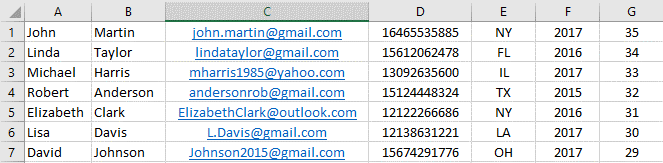
Supported file formats to import subscriber data are XLS, XLSX, and CSV. The files have to meet certain requirements:
- XLS, XLSX files: fields must be in different columns, one subscriber per line. Only an email or a phone number is required, you can leave all other cells blank.
- CSV files: fields must be separated with semicolons, one subscriber per line. Only an email or a phone number is required, you can enter semicolons for the missing data. For example:
John;Smith;smith@yahoo.com;+15417543011;info1;info2
;;john@yahoo.com
;;;+15417543010
Please note that phone numbers must be in international format, e.g. 11234567890 (including international calling code, “+” is not required, it will be added automatically).
Important! Subscriber data table in the file you want to import must not contain any empty rows. If it does, all the records below the empty row will not be imported.
After you checked that you have the right file type and that the data is formatted correctly, you can proceed further with importing the subscribers.
- Confirm that all subscribers included in the file you are going to upload have agreed to be added to your subscriber list, by ticking the checkbox.
- To upload a file, just drag and drop it into the specified area.
- Click “Submit file”. A new window to map columns to subscriber data will open up.
Can’t see the mapping window and your file is marked with red “X”? Make sure that your file is UTF-8 encoded, then remove the file from upload area and repeat the steps above.
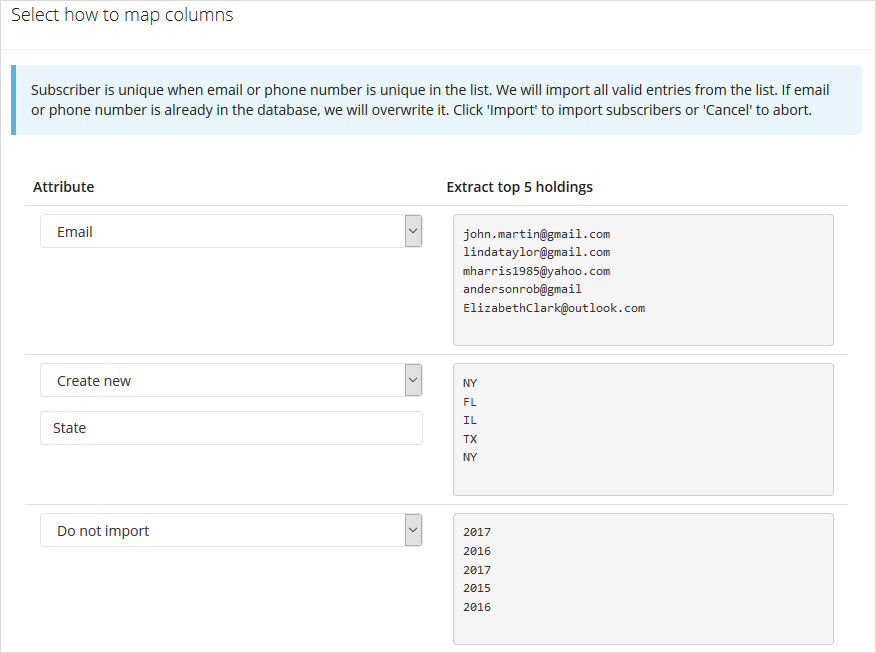
Because the data file you are importing will often contain fields arranged in a different order from the columns in your subscriber list, you have to map them to each other. Simply choose a column name from drop-down list next to each data block. If you want to skip some data and not import it to your subscriber list, leave “Do not import” next to it. On the other hand, if you do want to import a data block that does not have any allocated column in your subscriber list yet, select “Create new” and simply enter a column name you wish to be added to the subscriber list that will contain entries from this data block.
After you finished with mapping, click “Import”. If the file contains any errors, an error message will be displayed.
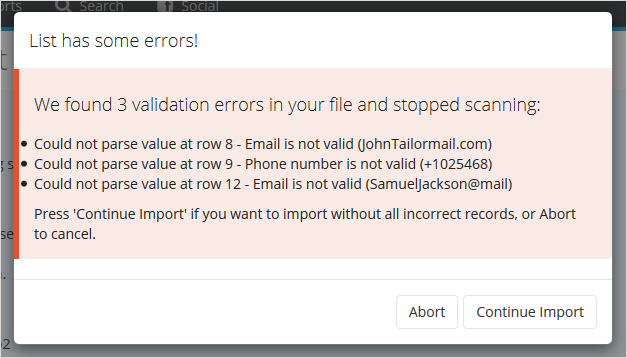
- You can abort subscriber import and correct the mistakes in your subscribers’ data file by clicking “Abort”.
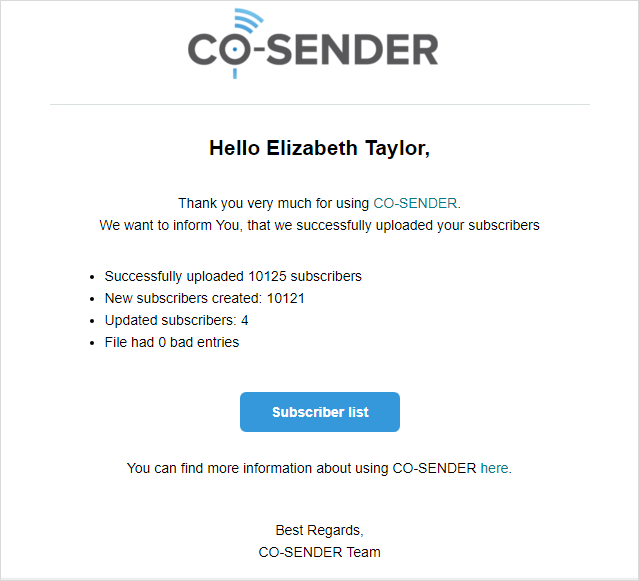
- On the other hand, you can select “Continue Import” and import the file anyway, but in this case subscribers with incorrect data won’t be imported to your list. When subscriber importing is complete, you will receive subscriber import confirmation to your email box with the subscriber import results.
Note that instead of updating your subscriber lists periodically yourself, you can choose often a more convenient option of using CO-SENDER provided subscriber sign up form. In this case when someone fills out and submits the form, his or her data will be added to your chosen subscriber list automatically.