
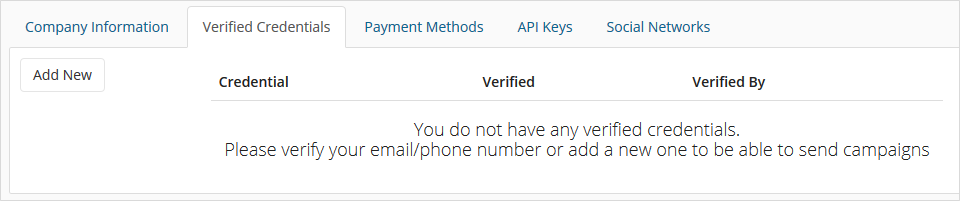
Verified Credentials are your verified email addresses and phone numbers that you can use when creating and sending campaigns via CO-SENDER.
Let’s start from Verified Email. A Verified Email is the email that you can use as an address from which you are sending your messages, and which will be displayed to your subscribers. Obviously, your subscribers will also be able to reach you through this email address.
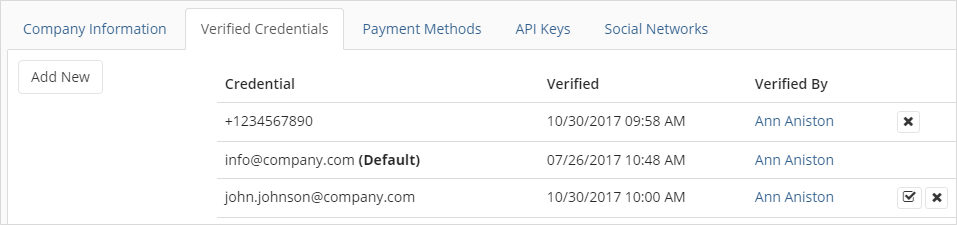
- You can see your Verified Emails in “Account Settings” under the “Verified Credentials” tab. Just click your account name in the top right of CO-SENDER and select “Account Settings” from the drop-down menu.
- You can choose your default Verified Email by checking the check-box next to it.
- To delete Verified Email address, click on “X” button next to the email address.
To add a new Verified Email, click on “Add New” button. You will see the following pop-up window:
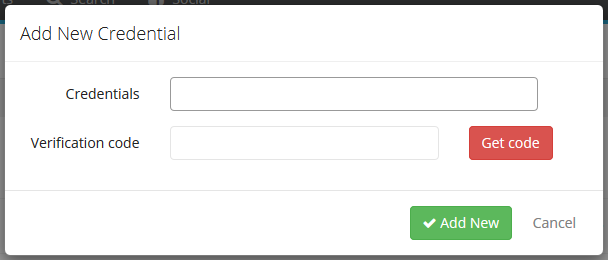
- Enter the email address that you want to add.
- Press the “Get code” button and a verification code will be sent to your selected email address.
- Enter the verification code and click “Add New” button to add your email.
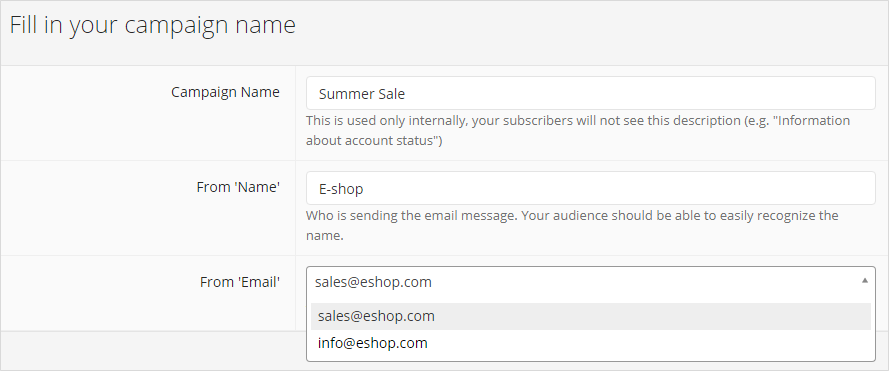
In this way you can verify more than one email address, and later, when creating your campaigns, select a Verified Email that you want to use for your “From Email” field.
Also note that if you have not verified your account email yet, you will see reminder message in the top part of the dashboard.
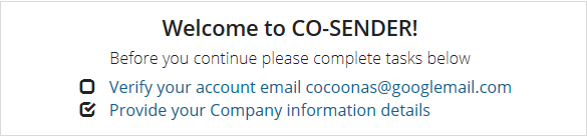
You won’t be able to activate your campaigns without verifying your account email first. Verified Credentials tab in Account Settings will be empty until you verify at least one credential. To resend verification email to you just click the link inside the reminder message. As soon as you verify your account email, this email automatically becomes your first Verified Credential.
Next is a Verified Phone Number. You can have one Verified Phone Number or more – as many as you want, it’s up to you. Why would you need them? Well it’s just that it’s always a good idea to send a Test Message before activating your SMS Campaign. To be able to do this, you need to have a Verified Phone Number.
Simply repeat the adding new credential steps for email addresses described above – but this time enter your phone number instead, and get verification code by SMS message. Then simply enter the code to “Verification code” field and click “Add New”.
That’s it, now you can send a Test SMS Message when creating your SMS Campaigns. Note however that you need to purchase SMS add-on to be able to verify your phone number and send a Test SMS Message.
You can add and verify as many credentials as you need. Note, however, that only users with account administrator rights can access this function.