
UTF-8 is a compromise character encoding that can be as compact as ASCII but can also contain any unicode characters (with some increase in file size).
UTF-8
Customized Solutions
CO-SENDER has almost everything you need, but lacks a particular feature in your mind? You liked the product but want a custom design or a theme built specifically for you? We love to create custom solutions for our customers, just let us know about your CO-SENDER application needs.
Dedicated IP Addresses
Every email service provider (Google, Yahoo, etc.) assigns a reputation score to each sender’s IP address. Each sender is evaluated by how they follow best practices, such as promptly unsubscribing customers and high engagement, and by such things as customer-based spam complaints, message bounce rate, etc.
Therefore, if you are sending more than 50k emails per week, it can be a good idea to use a dedicated IP address in order to isolate your reputation from all the other senders. If you are sharing your IP with other senders, you are also sharing your reputation with those other senders.
The other thing for large volume senders to consider is using separate IPs for your bulk and transactional emails. These two types of email have very different engagement rates, so separating the two ensures that one does not impact the reputation of the other. Moreover, delivery of time-sensitive transactional emails may get queued behind a large batch of marketing emails, therefore separating these two may be a wise choice.
If you are interested in a dedicated IP (additional fees apply), contact CO-SENDER Support, we will be happy to help you with this.
Click-Through Rate (CTR)
CTR is the percentage of recipients who clicked at least one link within your campaign email after opening it. The CTR rate shows how performing is the email creative and how interested subscribers are. You can check your CTR in campaign reports.
Bounced Messages
If you send campaign to an invalid email address or a closed email account, the message will ‘bounce’ because it can not be delivered to nonexistent email address. This is so called Hard Bounce. Such subscribers will be marked as bounced in your subscriber lists, and the next time you send a campaign these subscribers will be excluded from receiving your campaign.
However, if a message can not be delivered due to some temporary issue, like recipient’s email server is temporary offline, this is considered as a Soft Bounce and such email address will not be marked as a bounced subscriber in your subscriber list.
FAQ
Why can’t I log in?
First, you need to validate your email address by clicking the link which we sent to your mailbox. Make sure you are using the correct email address and password when you are logging into your account. If you are sure that the information you are entering is correct and you still can’t log in, you should reset your password on the login screen. Instructions will be sent to your email for how to change your password. Contact support if you are still experiencing difficulties.
I forgot my password. How do I reset it?
There are several ways to reset your password. The easiest is to click the “Forgot your Password?” button in the Login window. A window will open where you’ll have to enter your valid email address, where the instructions on how to reset your password will be sent. After receiving the email and following the link that came with it, you will be able to create a new password for your account.
How do I verify email when creating a new account?
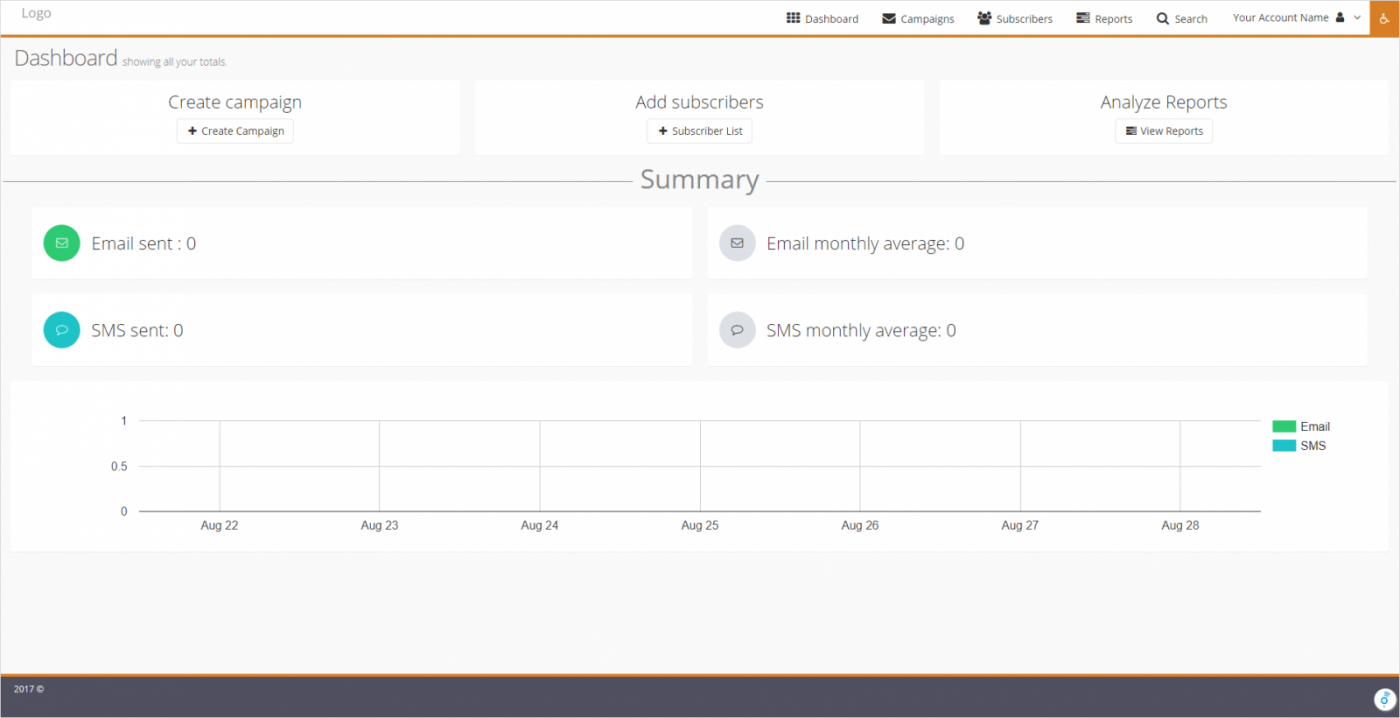
You will receive a welcome email from us when creating your account. Simply click “Confirm” button in the message to verify your email. In case you didn’t receive it, just login to your account, click the “Verify your account email” link in the dashboard, and message with confirmation link will be re-sent to you.
How to change my password?
To change the password, press the button on the “My Profile” screen. To change your password, enter the old password, your new password, and the new password a second time (to verify that it was entered correctly). To change the password – press the “Save” button. A password must contain a minimum of 8 characters including numbers and special symbols.
How do I create a new user?
To create a new user, you have to press the “All Users” button in your “Account Options”. The window with a list of users will appear. To create a new user, press “Add User”, and the “Create User” form is opened. Fill out the form, completing all of the fields, and select a role for the user. When all the information is entered, press “Save” and the user will be created. The new user will now appear in the user list.
How many users can I have in one account?
User number is not limited for your account – you can have as many as you like.
How can I reset a user’s password?
To reset a user’s password, click on “All Users” in the drop-down box and you will be presented with a user list. Press the “Reset Password” button on the same line where you see the user, whose password you want to reset. A window will appear asking you to confirm your decision. To continue, click on “Reset Password” and the selected user’s password will be reset.
How do I change my company information?
You can change your company information by going to “Account Settings” and changing the needed fields. To save changes press “Update”.
I can’t import subscribers list data file! What do I do?
First of all, make sure that you have checked the box that says: “These people gave permission to be added to my list”. Also check that your data file is in the right format, as shown on the subscribers list upload page. Important! The subscriber list data file must not contain any empty rows. If it does, all the of records below the empty row will not be imported.
I cannot delete subscribers list/segment. What do I do?
If you cannot delete your subscribers list or segment, it is most likely because there are active campaigns that use information from those lists. You should get a warning message with indicated campaigns that are using that subscribers list or segment. You will be able to delete them once the campaign is finished, but if you need to remove it quickly, you’ll have to delete the campaigns that use information from your subscribers list or segment.
How do I start using Free version?
You will automatically start with Free plan once you register your account at https://app.co-sender.com/login.
How does my “Free” plan work?
Free plan works exactly the same as a normal plan. You can send all of the messages and have as many users as you like. Almost all of the features are available on free plan. The only difference is that you have a limited number of emails available to send and you can only buy specific add-ons with Free plan. It is possible to upgrade into a paid plan at any given moment, and it will happen instantly without any transitional period.
What happens when my plan ends?
Once you reach a deadline of your plan and we don’t receive your payment for your next plan, you will be informed that your scheduled campaigns are suspended and you will be downgraded back to Free version.
What happens when my “Free” plan ends?
Your Free plan won’t end, because it doesn’t have an expiration date, and can be used forever. Every month, the plan limits will be renewed.
Why can’t I upgrade my plan?
If you currently have a normal plan, you can select one plan for next month. If you don’t select a plan for the upcoming month, your current plan will be selected by default. After that, you cannot change your plan or select another one. If you run out of messages, you can buy add-ons to increase your limits.
Why did my add-ons disappear?
Add-ons are purchased for your current plan only, and they expire at the same time as when the associated plan expires. You won’t see your current add-ons once you start the new plan.
Why can’t I send out my campaigns?
First of all, check your limits. It is possible that you don’t have enough messages left to complete your campaign. Also you can only schedule campaigns for the current plan and the next plan. If you are trying to schedule for a longer period of time, you won’t be able to activate campaigns.
Why is my campaign suspended?
Campaigns can be suspended because of two main reasons. The first reason is that we haven’t received your payment for next month’s plan, and all of the campaigns scheduled for next month got suspended. Another reason is that you had a campaign that was scheduled in advance, and edited or updated subscribers list or segment that campaign uses. In that case, the campaign will be suspended, because changes of subscriber list or segment may interfere with the campaigns successful execution.
What is a duplicate?
When you are sending a campaign, sometimes the system identifies a duplicate. Duplicate is two or more subscribers with the same information, they are detected when matches are found while adding them to the subscribers list. Duplicates are subscribers with same email addresses or phone numbers. Depending on which channel you are using, your campaign system will detect users with the same information (email address for email campaigns and phone number for SMS campaigns) and send only one message to one unique address or number.
Why do I see less limits left than number of messages that were actually sent?
If you see limits reduced more than the number of messages that were actually sent, it is most likely because of “Frozen limits”. Limits get reduced when you schedule your campaigns in advance by the number of messages necessary to complete campaign. Those messages are not sent yet, they are just frozen and waiting to be sent. If a campaign is deleted before it is started, all of the messages are returned back to your disposal and the limits are increased.
Why does the campaign date and time in the report differ from the date and time in the report list?
You may see that the date and time of a campaign in report list may differ from the date and time in the report itself. It happens because the date and time of the report is determined by time zone, which is chosen when creating campaign, whereas the date and time in the report list is determined by the time zone selected in Account Settings.
Creating A/B Test Campaigns
Wouldn’t it be great to know which of your email campaigns engages your subscribers more, gets you the best open and click rates, and send out the better one to your subscribers? Well, using A/B test, you can do exactly this!
A/B testing is a way of finding out which of two campaign versions (A or B) is more effective in terms of encouraging opens or clicks. In A/B test you set up two versions of one campaign and send them to a small percentage of your total subscribers. Half of the test group is sent version A content and the other half gets version B content. The results, measured by opens or clicks, determines the winning version which is automatically sent out to the remaining subscribers. You can also determine a winner version yourself (manually) if you wish so.
Click Here and watch Creating Email Campaign video tutorial
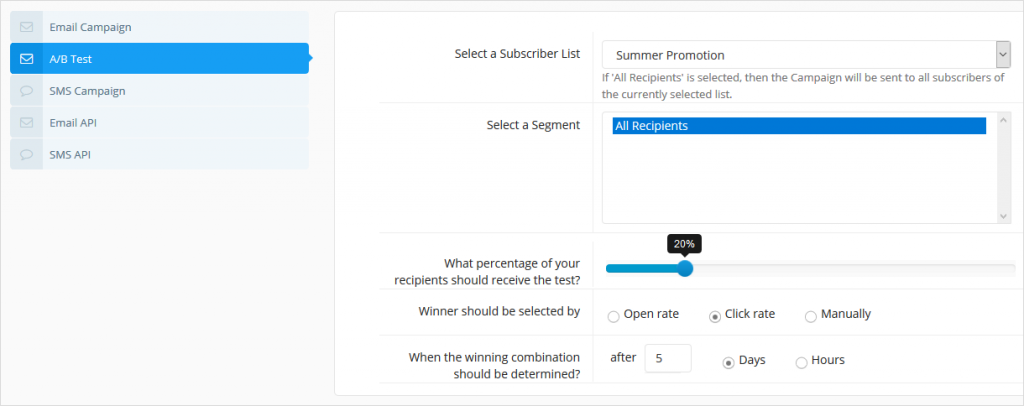
- Select “A/B Test” option from communication type menu.
- Select the subscriber list you want to receive your campaign (and a segment of subscribers if needed).
- Use slider to define the A/B test group size. Note that recipients in the test group will be selected randomly. Half of them will be sent version A while the other half will get version B. All the remaining recipients in your subscriber list will be sent out the winning version.
- Choose which performance measure, open or click rate, should be used to determine the winner version. If, however, you want to make decision about a winner yourself, choose “Manually”. In this case, after the A/B test is complete, you will be notified about the test results and then you can select a winner yourself.
- Set the length of time you want A/B test to run. Don’t worry though, there is always the option to finish the test and select the winner earlier (while the test is still in progress) if needed.
After you defined these A/B test settings, you can proceed with campaign creation as normal by filling in your campaign information, email subject line, and creating content for your message.
When done, you have your version A ready, and the next step is to choose the way you want to create content for the version B.
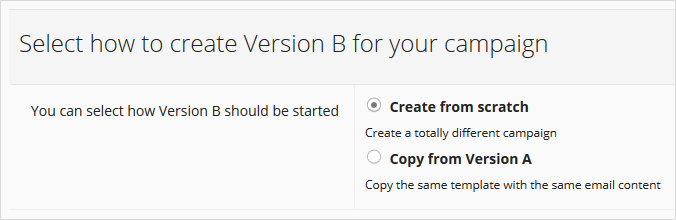
If you want to test two completely different campaign designs, select “Create from scratch” for your version B. On the other hand, if you want to use same version A content with only some elements changed, save time and effort, go for “Copy from Version A”. With this option you might want to test different email subject lines, titles, article length, images and more to check which one gets more opens and clicks.
When you are finished with the version B, proceed with campaign creation by following the on-screen instructions – you might want to add some files, set an auto resend, sharing to social networks, or schedule the start time for your campaign.
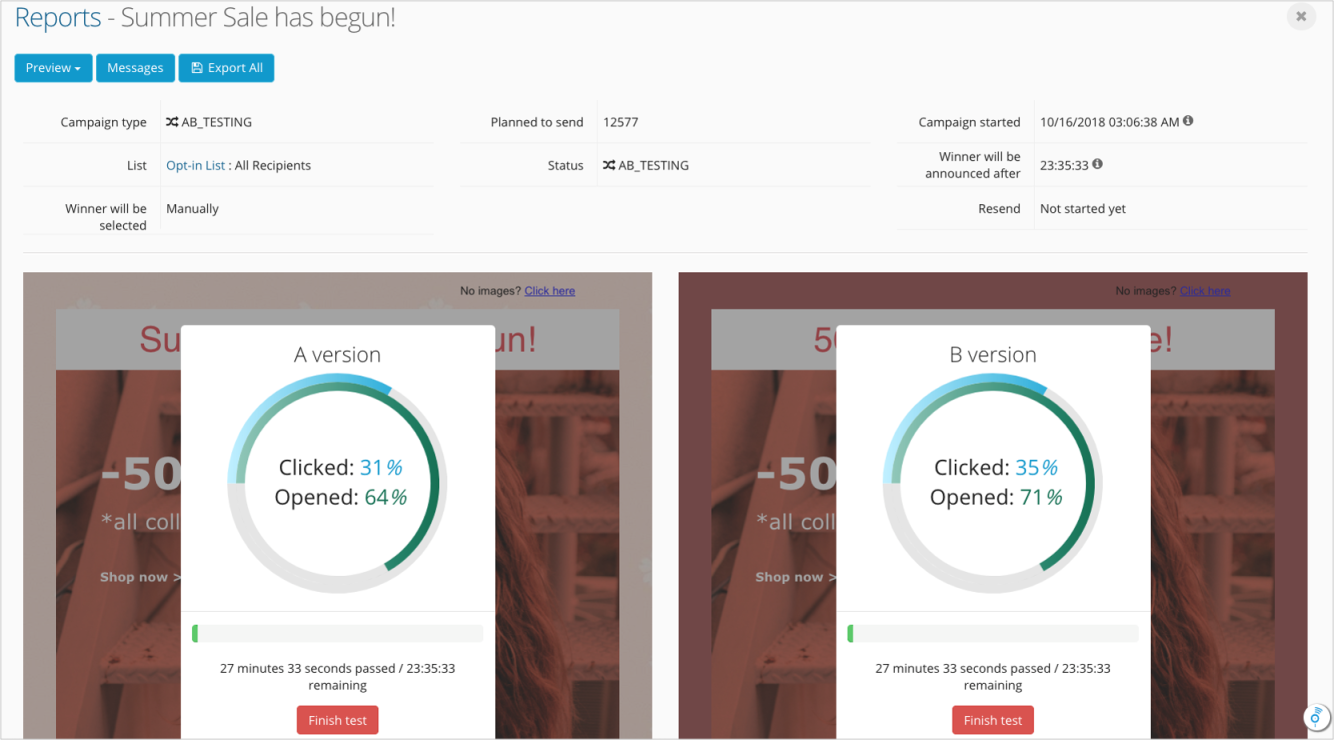
When campaign is activated, you can conveniently monitor campaign progress and the results for both versions. You can click “Finish test” anytime if you want to select a winner earlier and send out that version to your subscribers.
Personalizing Messages
Click Here and watch Personalized Messages video tutorial
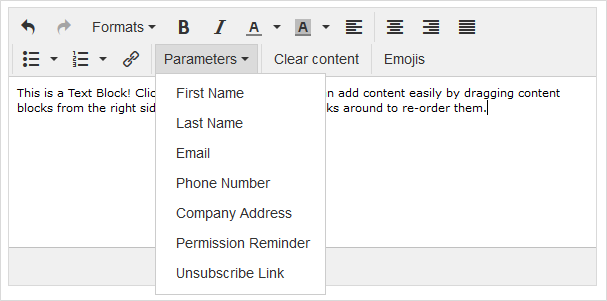
Apart from the pictures, links and many other elements that you can add to your message content using Content Designer, for any email or SMS message campaign you can also add Parameters. When sending your campaign, these parameters in the message will be automatically filled in with your subscribers’ information such as subscriber’s first name, last name, phone number, and email address (these are default four parameters). You can also add up to 50 additional parameters of your choice.

Understanding Messaging over API
Using API
This page will help you to get started with sending Email and SMS campaign messages via API.
API Overview
API is a way for you to send messages to your customers from your systems (CRM, CMS, e-commerce, etc.) using CO-SENDER in different communication channels – Email or SMS. You don‘t need to import your subscriber lists into CO-SENDER, or update them. You can send messages to your customers directly from your systems.
General process
Just a couple of steps and you can send messages using API:
- Go to Account Settings and create an API key in the “API Keys” tab – you can have as many API keys as you need;
- Create Email API or SMS API campaign. Note that you can personalize message content for your recipients by using parameters (such as customer’s first name, last name, email address, or any other additional fields you add);
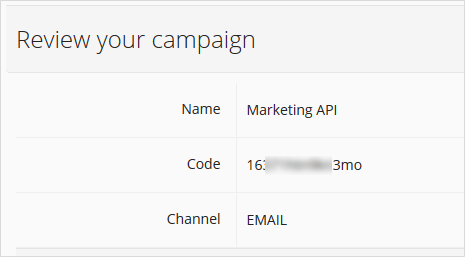
- Activate campaign and start sending via API! Use campaign code that is created at Campaign Review step and is always visible in campaign report.
REST clients
To use our API you could use one of the following awesome apps:
- Postman (Windows, MacOS)
- Insomnia (MacOS, Windows, Linux)
- Paw (MacOS)
- REST Easy Firefox Add-on (Firefox)
Base URL
Submit all requests to the base URL. All the requests are submitted thorough HTTP POST, PUT, DELETE or GET method. We strongly recommend you to submit all requests to CO-SENDER API over HTTPS so the traffic is encrypted and the privacy is ensured.
Base URL: https://api.co-sender.com/v1
Encoding
All request parameters, headers and body should be UTF-8 encoded.
Content-Type & Accept header
CO-SENDER API supports JSON Content-Types and Accept criteria that should be specified in the header. If the Content-Type is not specified you will receive a General error. JSON is returned by all API responses, including errors.
Content-Type header: application/json
Accept header: application/json
Authentication
Generate API key
Authenticate your account when using the API by including your secret API key in the request. You can manage your API keys in the Account Settings page. Your API keys carry many privileges, so be sure to keep them secret! Do not share your secret API keys in publicly accessible areas such as GitHub, client-side code, and so forth.
Warning! Keep your API key secret!
Authorization header
Authentication to the API is performed via HTTP Basic Auth. Provide your API key as the basic auth password value and username must always be api.
Example:
Username: api
Password: key_76p6defc2f5e2shq0t4ullbu2j

Base64 encoded string: 'YXBpOmtleV83NnA2ZGVmYzJmNWUyc2hxMHQ0dWxsYnUyag=='

Authorization header: 'Basic YXBpOmtleV83NnA2ZGVmYzJmNWUyc2hxMHQ0dWxsYnUyag=='
Example Request using username:password parameter:
$ curl 'https://api.co-sender.com/v1/messages' -i -u api:'<api_key>'
Example Request using Authorization header:
$ curl 'https://api.co-sender.com/v1/messages' -i -H 'Authorization: Basic YXBpOmtleV83NnA2ZGVmYzJmNWUyc2hxMHQ0dWxsYnUyag=='
API requests without authentication will fail. Requests that require authentication will return
404 Not Found, instead of403 Forbidden, in some places. This is to prevent the accidental leakage of private repositories to unauthorized users.
Methods
Send messages POST /v1/messages
To send a message or a batch of messages create a HTTP POST request to https://api.co-sender.com/v1/messages
Your Header should contain authorization and content type:
- Authorization:
Basic YXBpOmtleV83NnA2ZGVmYzJmNWUyc2hxMHQ0dWxsYnUyag== - Content-Type:
application/json
Request
Request body contains the message you wish to send with recipient and text parameters.
A sample JSON request for Email recipient is shown below:
POST /v1/messages HTTP/1.1
Host: api.co-sender.com
Authorization: Basic YXBpOmtleV83NnA2ZGVmYzJmNWUyc2hxMHQ0dWxsYnUyag==
Content-Type: application/json
Accept: application/json

{
  "code": "u5t69i3mlib87",
  "messages" : [
    {
      "recipient" : "email@domain.com",
      "parameters" : {
        "first_name" : "John",
        "order_id" : "ABC12345",
        "anything_else_here" : "Doe"
      }
    }
  ]
}
Similarly, JSON request for SMS recipient would look like this:
{
  "code": "b5t78i3uyib12",
  "messages" : [
    {
      "recipient" : "13108713613",
      "parameters" : {
        "first_name" : "John",
        "order_id" : "ABC12345",
        "anything_else_here" : "Doe"
      }
    }
  ]
}
Request parameters:
| Path | Required | Type | Description |
|---|---|---|---|
code |
✓ | String |
Campaign code |
messages |
✓ | Array |
Array of message objects |
messages[0..10].recipient |
✓ | String |
Recipient address (email or mobile phone number) |
messages[0..10].parameters |
Map |
Key-value pairs representing message parameters |
Message parameters are optional but must be provided in order to fill-in placeholders in the campaign content text. In some cases we can derive useful information about the subscriber from the recipient address and provide it for you. Here is the list of parameters:
%recipient.first_name%– First name of subscriber%recipient.last_name%– Last name of subscriber%recipient.email%– Subscriber’s email address%recipient.phone_number%– Subscriber’s phone number${permission_reminder}– Campaign’s permission reminder text${unsubscribe}– Unsubscribe link${company_address}– Company address
You can also pass your own ${permission_reminder}, ${unsubscribe} and ${company_address} parameters and they will override default values.
You can add additional parameters in the request. These parameters must be also added to the campaign message content in the %recipient.any_parameter_here% format as described in the Creating Campaign with API section. These parameters must have the same name as they are named in the message content. For example your request could look like this:
{
  "code": "u5t69i3mlib87",
  "messages" : [
    {
      "recipient" : "email@domain.com",
      "parameters" : {
        "date_of_birth" : "1988-03-28",
        "occupation" : "Developer"
      }
    }
  ]
}
where date_of_birth and occupation are your own custom parameters that you enter in your campaign content as %recipient.date_of_birth% and %recipient.occupation% accordingly.
Keep your parameters short and easy to understand.
If you pass parameters that are not in the message content – they will be ignored. If you do not pass parameters that are defined in the message content – we will leave placeholder text in the generated message. For example:
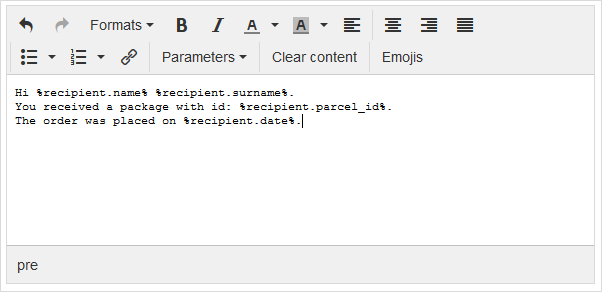
Your message text could look like this:
Hi %recipient.name% %recipient.surname%. You received a package with id: %recipient.parcel_id%. The order was placed on %recipient.date%.
You pass these placeholders with your request:
"name"– John"surname"– Doe"parcel_id"– US12345ABC
The message we will sent will be:
Hi John Doe. You received a package with id: US12345ABC. The order was placed on %recipient.date%.
As you can see, you forgot to pass “date” parameter that you defined in your message content – therefore the placeholder text was left unused in the generated message.
Response
After the HTTP request was submitted to the CO-SENDER API, you will get a response containing some useful information. If everything went well, it should provide an 200 OK response with message details in the response body.
Response:
{
  "code": "u5t69i3mlib87",
  "messages": [
    {
      "messageId": "9555c510-be0c-11e6-b257-1d3531107724",
      "recipient": "email@domain.com",
      "status": "OK",
      "message": "OK"
    }
  ]
}
| Path | Type | Description |
|---|---|---|
code |
String |
Campaign code |
messages |
Array |
Array of message responses |
messages[0..10].messageId |
String |
Created message ID |
messages[0..10].recipient |
String |
Message recipient |
messages[0..10].status |
String |
Response status code: OK, WARNING, ERROR |
messages[0..10].message |
String |
Response message text |
Message response status indicates the status of the message. OK and WARNING messages were sent successfully, but messages with ERROR status were rejected. Please look at the response message text to get more information why the message sending failed.
Error response codes
In case of failure please refer to Error codes section for more information about the errors.
| Error code | HTTP status code | Description |
|---|---|---|
| 2003 | 400 | Invalid recipient phone number |
| 2004 | 400 | Invalid recipient email |
| 2101 | 400 | Campaign you are trying to send message for is inactive |
| 2102 | 400 | Account message limit is reached |
| 1000 | 500 | Internal system error |
Examples
Bellow you will find some examples using different languages
curl:
$ curl 'https://api.co-sender.com/v1/messages' -i -X POST -H 'Content-Type: application/json' -u api:<api_key> -d '{"code":"u5t69i3mlib87","messages":[{"recipient":"email@domain.com"}]}'
PHP:
$request = new HttpRequest();
$request->setUrl('https://api.co-sender.com/v1/messages');
$request->setMethod(HTTP_METH_POST);

$request->setHeaders(array(
  'Authorization' => 'Basic ' . base64_encode('api:<api_key>')
  'content-type' => 'application/json'
));

$request->setBody('{\"code\": \"u5t69i3mlib87\",\"messages\":[{\"recipient\":\"email@domain.com\"}]}');

try {
  $response = $request->send();

  echo $response->getBody();
} catch (HttpException $ex) {
  echo $ex;
}
Javascript:
var api_key = "your_api_key"
var settings = {
  "async": true,
  "beforeSend": function (xhr) {
      xhr.setRequestHeader ("Authorization", "Basic " + btoa("api:" + api_key));
  },
  "crossDomain": true,
  "url": "https://api.co-sender.com/v1/messages",
  "method": "POST",
  "headers": {
    "content-type": "application/json",
  },
  "processData": false,
  "data": "{\"code\": \"u5t69i3mlib87\",\"messages\":[{\"recipient\":\"email@domain.com\"}]}"
}

$.ajax(settings).done(function (response) {
  console.log(response);
});
Error codes
CO-SENDER uses conventional HTTP response codes to indicate the success or failure of an API request along with API specific error codes.
Here is how an error response looks like:
{
  "type": "CLIENT",
  "code": 2101,
  "status": 400,
  "timestamp": "2016-12-12T08:58:53.809+0000",
  "error": "Bad Request",
  "message": "Campaign is inactive"
}
| Path | Type | Description |
|---|---|---|
type |
Enum |
Indicates error type. Can be CLIENT or SYSTEM. |
code |
int |
Error code |
status |
int |
HTTP status code (see next section for more detailed description on HTTP status codes) |
timestamp |
String |
Date and time when the error has occurred (based on the ISO-8601 standard). Format: yyyy-MM-dd'T'HH:mm:ss.SSSZ |
error |
String |
Abstract error description (typically HTTP status message) |
message |
String |
Error message |
HTTP status code summary
In general, codes in the 2xx range indicate success, codes in the 4xx range indicate an error that failed given the information provided (e.g., a required parameter was omitted, a limit reached, etc.), and codes in the 5xx range indicate an error with CO-SENDER’s servers (these are rare).
| Code | Text | Description |
|---|---|---|
| 200 | OK | Everything worked as expected. |
| 400 | Bad Request | The request was unacceptable, often due to missing a required parameter. |
| 401 | Unauthorized | No valid API key provided. |
| 402 | Request Failed | The parameters were valid but the request failed. |
| 404 | Not Found | The requested resource doesn’t exist. |
| 409 | Conflict | The request conflicts with another request (perhaps due to using the same idempotent key). |
| 429 | Too Many Requests | Too many requests hit the API too quickly. We recommend an exponential backoff of your requests. |
| 50x | Server Errors | Something went wrong on Stripe’s end. (These are rare.) |
CO-SENDER error codes
| Code | Description |
|---|---|
| 1000 | Internal system error |
| 2003 | Invalid recipient phone number |
| 2004 | Invalid recipient email |
| 2101 | Campaign you are trying to send message for is inactive |
| 2102 | Account message limit is reached |
Creating Campaigns with API
API Campaigns is a way to send Email or SMS Campaign messages to your customers directly from your system (CRM, CMS, e-commerce, etc.) using CO-SENDER. Just a few steps and you will be able to create Campaigns using API.
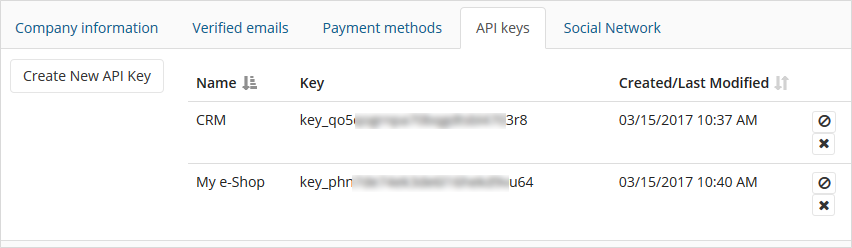
- Go to “Account Settings” and select “API keys” tab.
- Click “Create New API Key”, enter a name of your choice, and your API key is ready! You can repeat this step and have as many API keys as you need – you can also disable a key or delete it when needed. You can use these same API keys with all your future Campaigns (you don’t need to create new API keys again). Warning! Keep your API key secret!
Start and proceed with Campaign creation as normal, but during the second Campaign creation step “Subscribers” you need to select “API” tab instead of “Subscriber list” tab – you don’t need to select any Subscriber list here for your API campaign.

There are two types of Campaigns that can be sent by API, select the one you need – transactional or marketing.
- Transactional – one-to-one messages containing information that completes a transaction or process the recipient has started with you. A common example is in e-commerce, after purchasing an item you receive an email receipt that has information about the item, price, and shipment. Transactional email is sent to individuals rather than a large list of recipients.
- Marketing – any email that contains a commercial message or content intended for a commercial purpose is considered a marketing email. Be aware that any commercial email must follow local anti-spam laws, therefore this type of API Campaign has company address, permission reminder and “Unsubscribe” link parameters automatically added to your campaign messages. Marketing email is generally sent to groups of contacts that are prospects or customers.
When creating your Campaign content you can choose predefined default parameters (first name, last name, email, phone number, company address) or/and create your own parameters in your message content in the %recipient.any_parameter_here% format to be later automatically filled in from your system (CRM, CMS, e-commerce, etc.).
Campaign code is created at the final Campaign creation step – you will need this code to send this particular Campaign message.
After you finished creating your API Campaign (activated it at the final step), you can pause it and edit it as long as you haven’t sent any messages yet, just open the Campaign and click on pause button. You can activate it again whenever you want. However if you sent at least one message with this Campaign code, you won’t be able to edit it anymore, though you still can pause it, or stop it completely.
Congratulations! You’ve just created your first API Campaign. All the information and steps on how to send this API Campaign to your recipients is described in detail here.