
Every CO-SENDER account has two levels of access available for the users, i.e. two roles – admin and user. A simple user can view basic account information, create campaigns, subscriber lists, and perform other general tasks in the account. However simple users can NOT add new users, buy add-ons and new plans, check purchase and payment history, or connect social networks to CO-SENDER account. All these actions are reserved solely for the admins.
Understanding User Roles
Viewing Purchase History
In your CO-SENDER account you can view your whole purchase and payment history, successful and unsuccessful payments and their dates, download a pdf file with invoice for any purchase and payment made, and also check when the next payment is due.
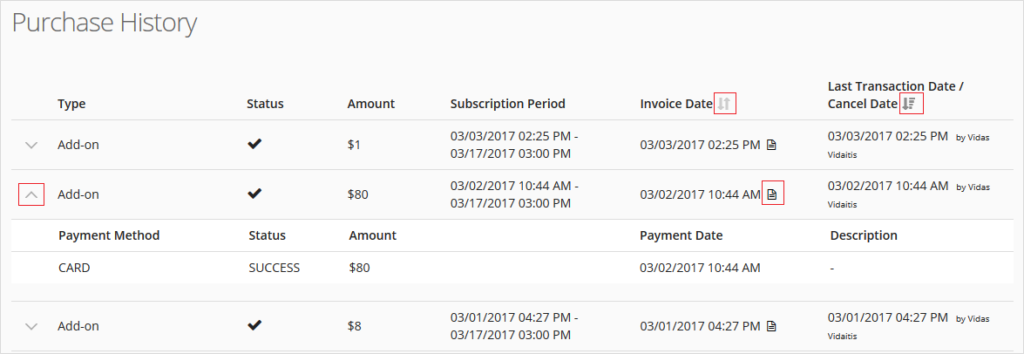
- Go to “Account Settings” and click on “Purchase History” button.
- You can see listed all the information about your payments. Sort them by invoice date or by transaction date if you need.
- Click on any transaction to view its status (success or failure) and description.
- You can download the invoice as well, just click on the file icon in “Invoice Date” column.
Resending Campaigns
To boost your Subscriber engagement, you may want to resend your Campaign for Subscribers who did not open it at all, or for those who opened your Campaign but did not click any links inside it. You can arrange auto resend while creating your Email Campaign, during “Resend” step.
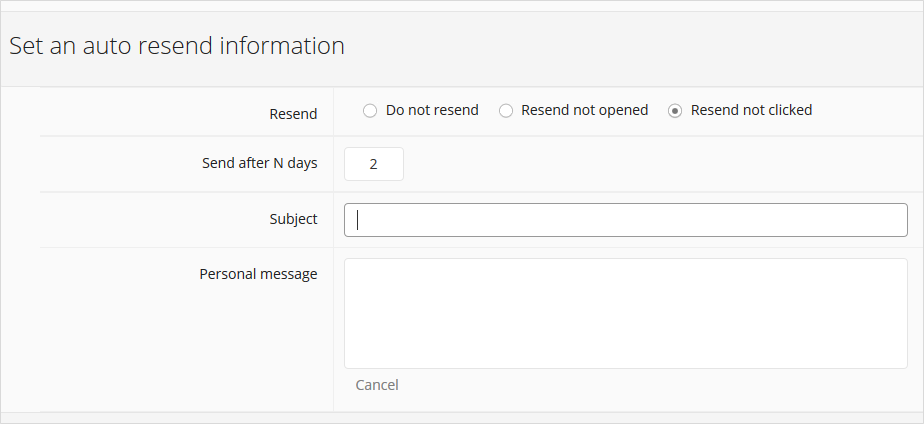
- Select the type of resend you want – “Resend not opened” or “Resend not clicked”.
- Enter the number of days after which you want your Campaign messages to be resent.
- You can add subject to your Resend messages – this subject will be displayed when sending your Resend messages instead of the original email subject. You can also optionally add personal message to your Resend emails.
Note that there is no auto resend option for SMS Campaigns and for Email Campaigns with API. Also, please note that if you add any new subscribers to your subscriber list while the campaign was already activated, the newly added subscribers won’t be included in the resend.
Sharing Campaigns to Social Networks
To boost your email campaign audience, you may want to share your campaign to social networks. You can arrange this during “Resend” step when creating your campaign.
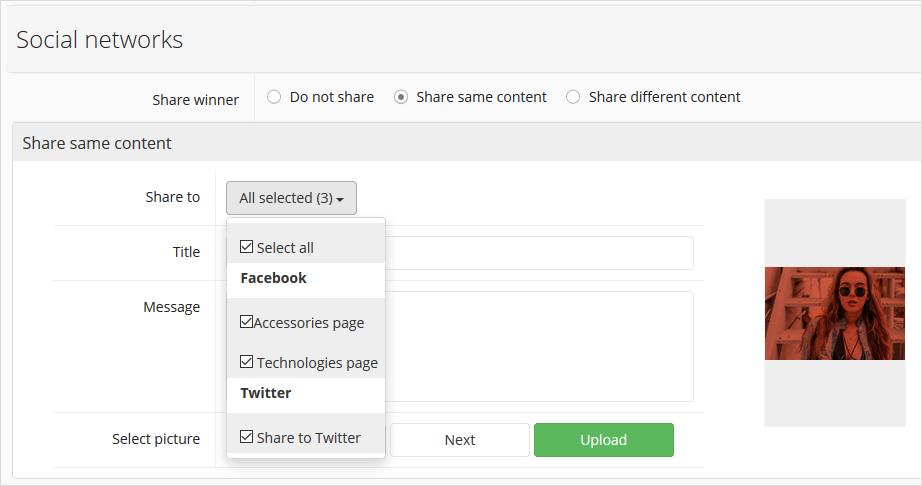
You can upload any image to show up in your social network post, or simply choose one from your campaign content images. Note also that you can share different images and messages depending on the winner version when creating A/B test campaigns.
To see all the posts you ever shared to social networks just click “Social” in the main CO-SENDER menu.
Connecting to Social Networks
To boost your email campaign audience, you may want to share your campaigns to social networks. To do this you need to connect your Facebook or Twitter account to your CO-SENDER account.
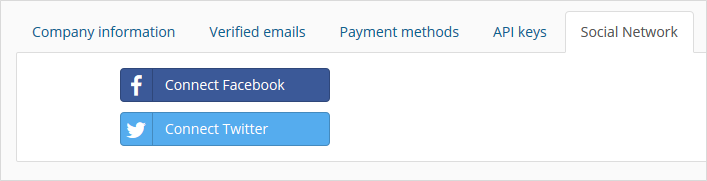
- Go to “Account Settings” and click on “Social Network” tab.
- Choose the social network you want to connect to CO-SENDER account.
- Confirm your choice by submitting your username and password.
- Repeat the steps above if you want to connect both, your Facebook and Twitter accounts, or to connect multiple Facebook Pages.
Now you will be able to view all your shared campaigns to so social networks anytime you want – just click on “Social” in the main menu, and then choose the “Social Posts” tab.
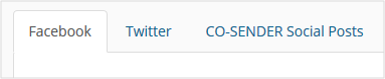
“Facebook” and “Twitter” tabs display the respective posts in your social networks, while the “Social Posts” tab shows all the campaigns you shared from your CO-SENDER account.
Using HTML template
You can use the “HTML Source” template in Content Designer. It can be found among all the other templates of Content Designer.

There are a couple of ways to fill in HTML content.
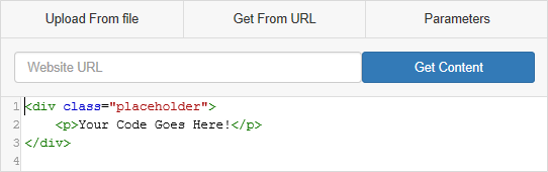
- Type your content in as you can see in the picture.
- Upload content from file. Select the file from your hard drive and upload it.
- Load your content from a URL. Paste your website URL and press “Get Content”. Website HTML code will be inserted into the content field.
- You can also insert parameters (first name, last name, email, phone number, etc.) into the HTML content in the same way you compose an ordinary email campaign message.
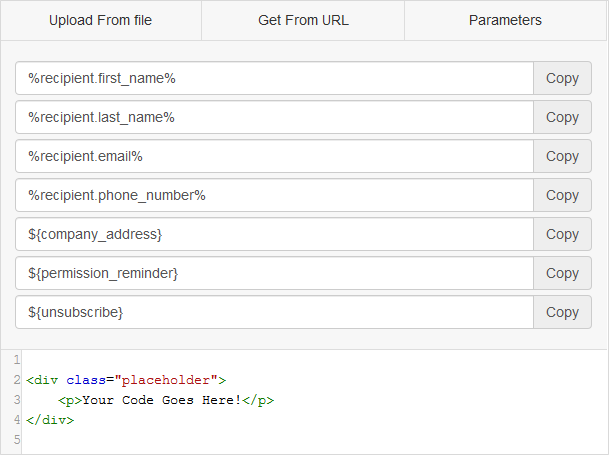
Click “Copy” and then paste that parameter anywhere in the content of your message.
Using Content Designer
Click Here and watch Using Content Designer video tutorial
You can design your Campaign content via Content Designer, during the third step of Campaign creation. The step is intuitively named “Content”. You will find many pre-designed templates and themes that can be used as the basis of your campaign content.
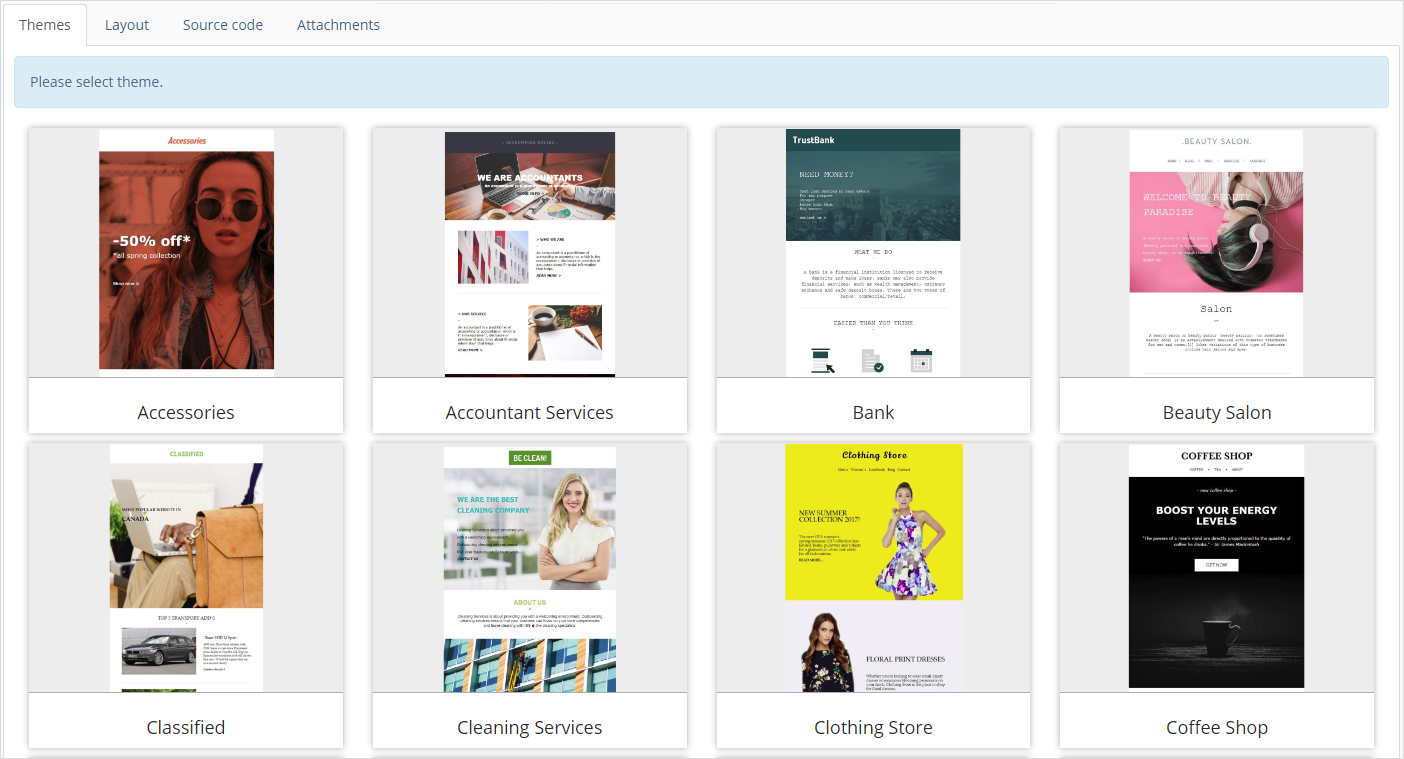
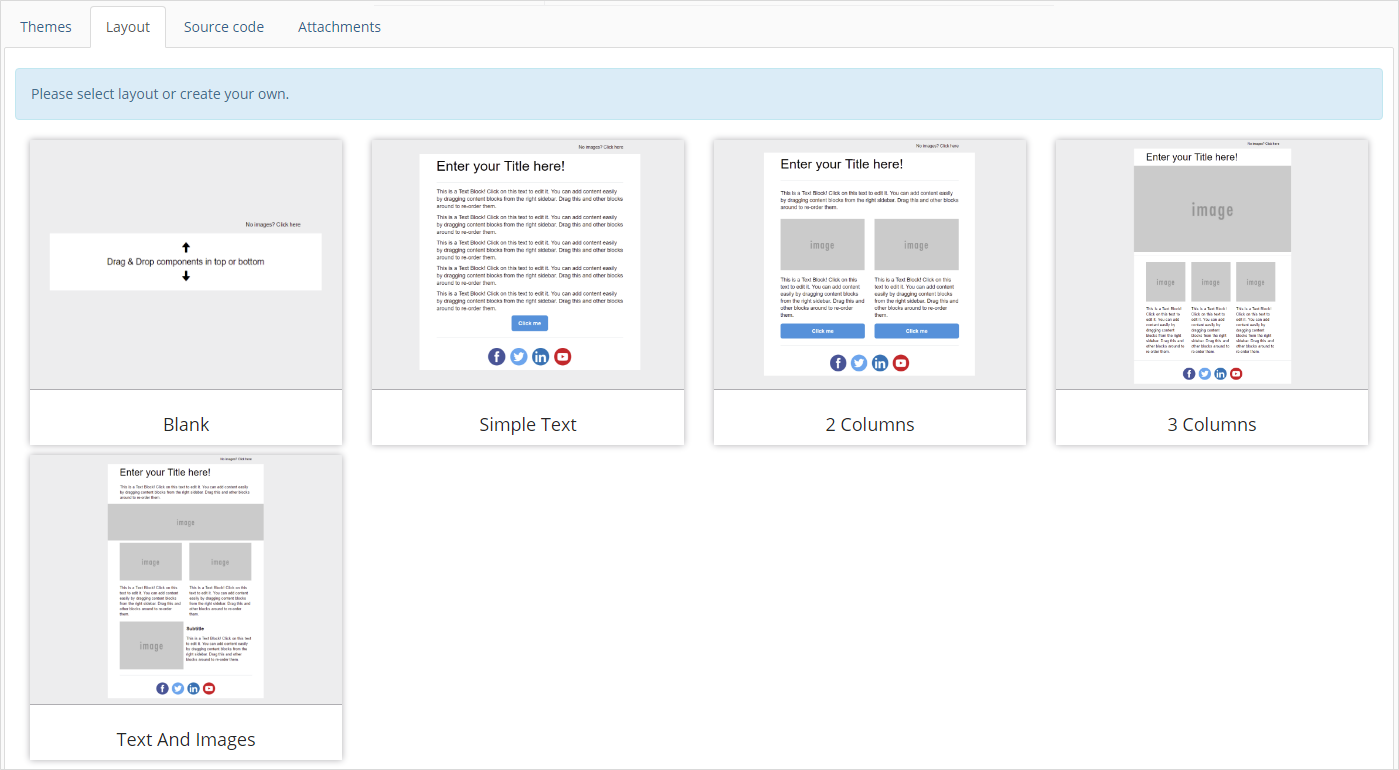
- “Themes” are templates with pre-maid designs that you can edit and customize further as you wish.
- “Layout” templates have only basic preset designs that are fully customizable for even more flexibility. There is also “Blank” template that you can use if you want to design all content of your message from the ground up.
- “Source code” template allows you to upload HTML from your file or get HTML source code from any URL, and edit it afterwards to design content for your campaign.
After you selected your template, Content Designer window will open up. You will see all the design elements you can insert into campaign content and their settings on the right side of your screen.
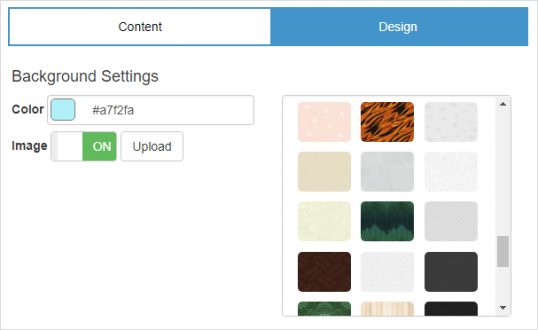
If you want to add a background for your campaign, click on “Design” and select a color you want with the color picker, a pre-designed background pattern, or simply upload an image of your choice.
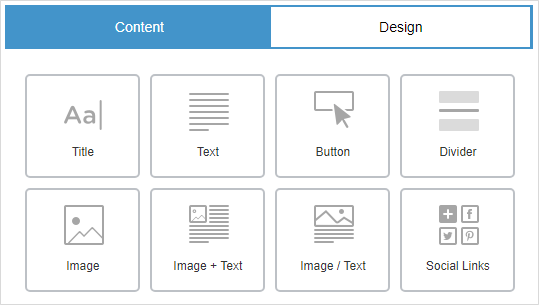
To insert any content element (Title, Text, Button, Image etc.), select “Content” and drag and drop the element onto content you are designing.
When you insert a design element, it looks like this:
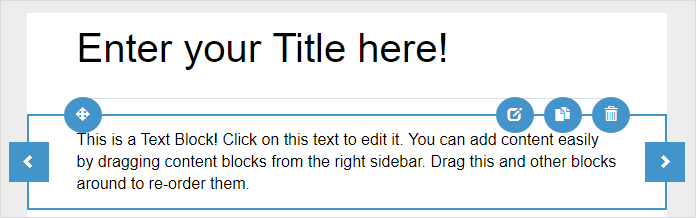
When clicked on an element, the functional buttons are visible that you can use to:
- change the element placement position,
- edit selected element,
- duplicate the element,
- delete the element.
Every design element has its own editing window where you can tweak its parameters. The picture bellow shows editing window of the “text” design element:
- Content;
- Settings.
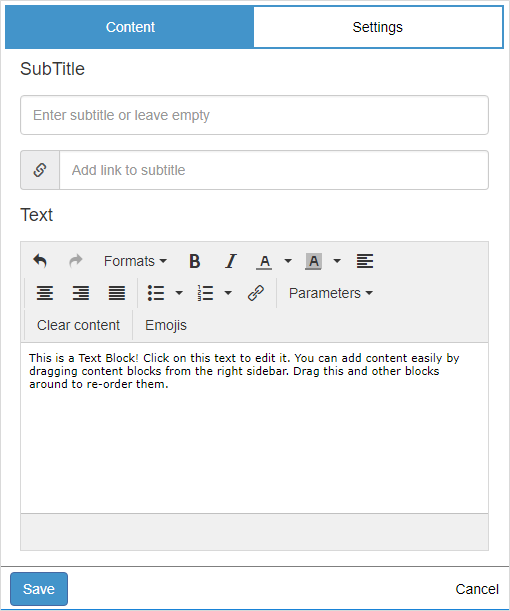

- “General” options allow you to change things such as the background color.
- “Settings” provide options to change the picture padding.
- “Content” options allow you to insert a link which will be opened when the picture is clicked on. You can also insert the link to the picture in the “image source” field and change its size.
- “Parameters” allow you to insert the parameters you want to be automatically filled in with your subscribers’ information to personalize the message when sending your campaign.
- To apply your changes press “Apply and close”.
Click Here and watch Personalized Messages video tutorial
You can also upload and edit images that you will be using when creating content. When you are done editing, you can review your template in the “Preview” window. Do not forget to save your work.

Understanding SMS Length
One SMS can contain up to 160 characters (or up to 70 if special characters are used). Large content messages (concatenated SMS, multipart or segmented SMS, or “long SMS”) can be sent using multiple messages in which case each message should consist of 153 characters (67 if special characters are used).
When sending SMS messages to recipients, actual count of SMS messages may vary depending on message length. For example if message length is more than 160 characters and less than 306 characters (or more than 70 characters and less than 134 characters when special characters are used) two SMS messages will be sent to the recipient and 2 SMS credits will be deducted from your account.
When your SMS message content doesn’t fit into 1 SMS, the amount of regular messages needed will be shown in brackets inside of campaign report and activity review.
Understanding Declined Payments
Payment decline indicates that the customer’s bank has refused the transaction request. Sometimes it is difficult understand why it was declined by reading the response code, only the customer’s bank can confirm the specific reason. Here are a few of the most common ones:
- Incorrect credit card number or expiration date;
- Insufficient funds;
- Some banks will reject charges based on location;
- Some banks will reject charges based on their own fraud rules.
Deleting Account
If you want to delete your account with all of its information, you can do that by going to “Account Settings” and clicking on the button at bottom right “Delete Account”.
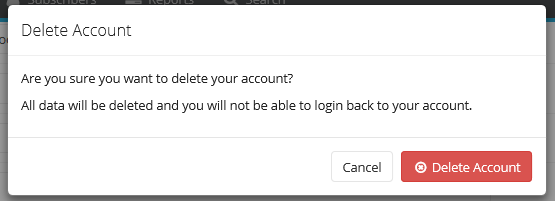
Warning message will show up asking for your confirmation. If you are sure that you want to delete your account, click “Delete Account”.
Please note, if you still have an active plan, you will need to cancel your subscription first, and wait for your current plan to expire.