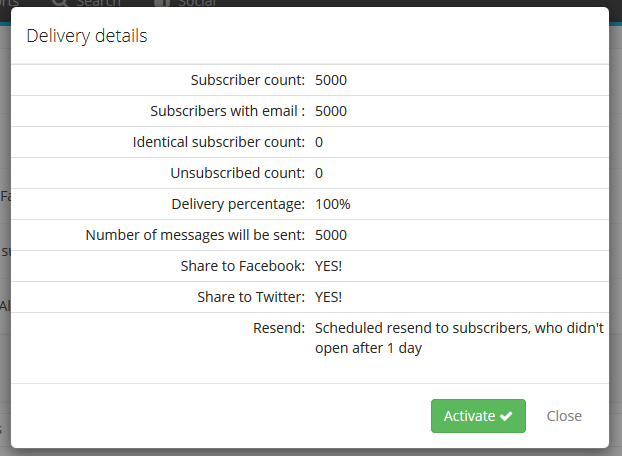
If you are sending messages to a list of subscribers which contains a couple of subscribers with the same email address and phone number, such subscribers will be marked as duplicates and your message will only be sent once through the recurring channels. If any duplicates are found, the count of these and campaign delivery percentage will be shown in “Delivery details” window before the campaign activation.
Similarly, if your subscriber list contains subscribers who unsubscribed from you, these subscribers will not receive your campaign, and the exact count of unsubscribes will be shown to you in “Delivery details” before activating campaign.
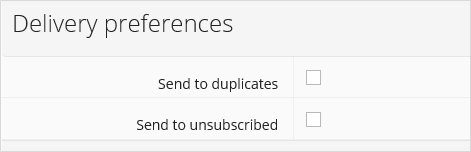
However, if you do want all duplicate or unsubscribed subscribers in your list to receive your campaign, you can easily overwrite this default setting. Simply check “Send to duplicates” or “Send to unsubscribed” checkbox in “Delivery preferences” section before activating your campaign.
Note however that the “Send to unsubscribed” option is available only to verified accounts.
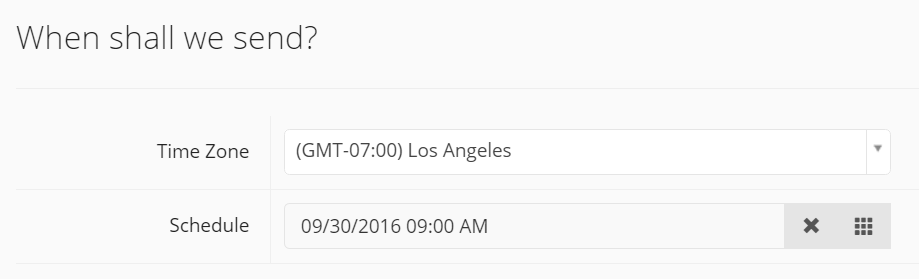
A campaign can be scheduled at the last step of the campaign creation process (Review). Campaign scheduling allows you to set a time and date when you want your messages to start getting sent automatically.
Select a date and a time at which your messages will be sent.
Select the time zone where the majority of your audience is located.
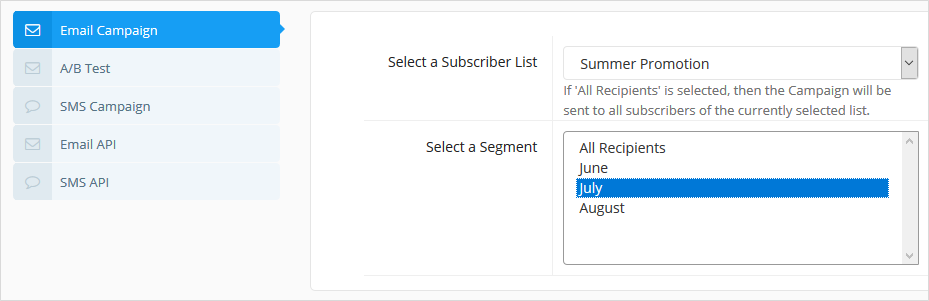
You can choose to create a campaign directly from Dashboard, or by selecting “Campaigns” from the main menu. After you choose the campaign type you want, select a subscriber list that will receive your campaign.
Select the Subscriber list you want to receive your campaign.
Select a segment of subscribers (sub-group of subscribers according to your selected attributes) if needed.
Fill in campaign information.
Enter a subject line (for email campaigns).
Create the message. With help of Content Designer you can modify your message and insert pictures, links and many other elements. For any email or SMS message campaign, you can also add parameters such as first name, last name, phone number, email address, etc. that will be automatically filled in with your subscribers’ information to personalize the message when sending your campaign. Please note that when creating SMS message campaign, SMS message length is very important.
Select social networks to share your campaign (for email campaigns).
Activate the campaign (or send a test message before activating).
It’s always a good idea to send a test message before activating your campaign. Please note that for the SMS Campaigns, to send a test message, you need to have a verified phone number.
Note that many mobile network operators are requiring that you register your Sender’s Name and other information before sending bulk SMS campaigns. Therefore, to make sure that your Text Messages are delivered to your subscribers, we strongly recommend contacting us in advance in order to be registered with mobile network operators.
To start the pre-registration process, please contact CO-SENDER Support.
Campaign can have different status depending on what stage the campaign is in:
Draft – campaign was created or modified and then saved without being activated.
Scheduled – campaign is scheduled to be processed in the future.
Suspended – scheduled campaign was suspended due to an unsuccessful subscription payment, subscriber list was edited or main service conditions not being met.
Active – When it is time to start sending messages, a campaign will start processing until all of the messages are sent.
Aborted – campaign has stopped during execution.
Finished – campaign has successfully finished executing and the messages have all been sent.
Very important aspect of list management is segmentation of your subscriber lists. When creating a segment, you are actually grouping your subscribers by certain parameters into subscriber subsets that can be used later to better target your campaigns.
To create a segment, go to “Subscribers” tab and choose the list you want to segment. Now scroll to the bottom of the page and click on “+ New Segment” button. The pop-up window, allowing you to create a segment, will open up.
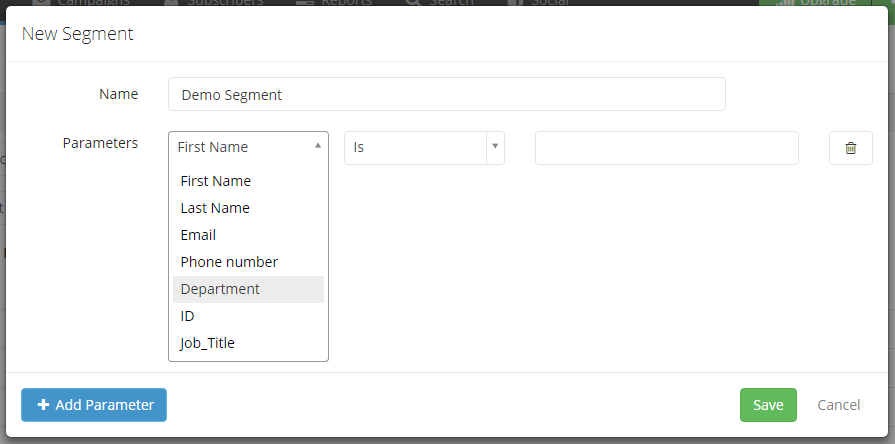
Enter a name for the new segment so you could remember what the new segment is for.
Click “+ Add Parameter” button to add a parameter to the segment.
From the drop down menu select a column from your subscriber list that holds parameter by which you want to segment your list (if you need to add additional columns to your subscriber list to hold a certain parameter to segment your subscribers, please check out the topic on Managing Additional Fields).
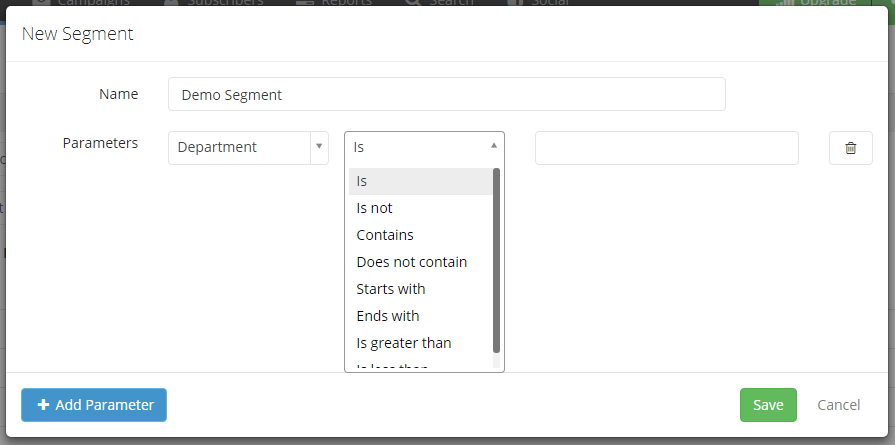
From another drop down menu select a rule that will be applied to filter the chosen column.
Lastly, enter a word, number, or any characters that will be used to filter the chosen column.
Click “Save”, and the segment is ready to use!
Now, when creating a campaign, instead of emailing everyone on your subscriber list, you can choose to send campaign only to the filtered out recipients in the segment.
You can find this segment, as well as other segments you create for this list, listed in the bottom part of the window of any selected subscriber list.
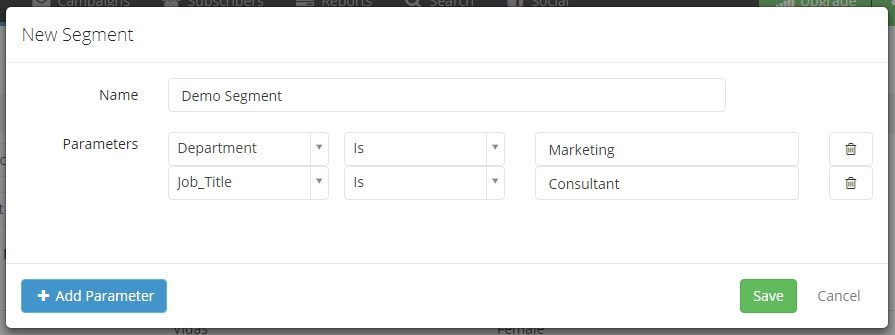
Note that when creating a segment you can use more than one parameter to filter out your subscribers even further. For example, to create a segment that holds all the recipients in your list from “Marketing” department AND who’s job title is “Consultant”, you do exactly that – add to parameters to the segment:
Note that a segment can’t be deleted after it has been used in a campaign. Also note that when you copy a subscriber list, all the segments in that list will be automatically copied and included in the new list.
To import a file with subscriber data, go to Subscribers, select a subscriber list to which you want to import new subscribers, and then press “Import Subscribers” button which will take you to subscribers import window.
Supported file formats to import subscriber data are XLS, XLSX, and CSV. The files have to meet certain requirements:
XLS, XLSX files: fields must be in different columns, one subscriber per line. Only an email or a phone number is required, you can leave all other cells blank.
CSV files: fields must be separated with semicolons, one subscriber per line. Only an email or a phone number is required, you can enter semicolons for the missing data. For example:
Please note that phone numbers must be in international format, e.g. 11234567890 (including international calling code, “+” is not required, it will be added automatically).
Important! Subscriber data table in the file you want to import must not contain any empty rows. If it does, all the records below the empty row will not be imported.
After you checked that you have the right file type and that the data is formatted correctly, you can proceed further with importing the subscribers.
Confirm that all subscribers included in the file you are going to upload have agreed to be added to your subscriber list, by ticking the checkbox.
To upload a file, just drag and drop it into the specified area.
Click “Submit file”. A new window to map columns to subscriber data will open up.
Can’t see the mapping window and your file is marked with red “X”? Make sure that your file is UTF-8 encoded, then remove the file from upload area and repeat the steps above.
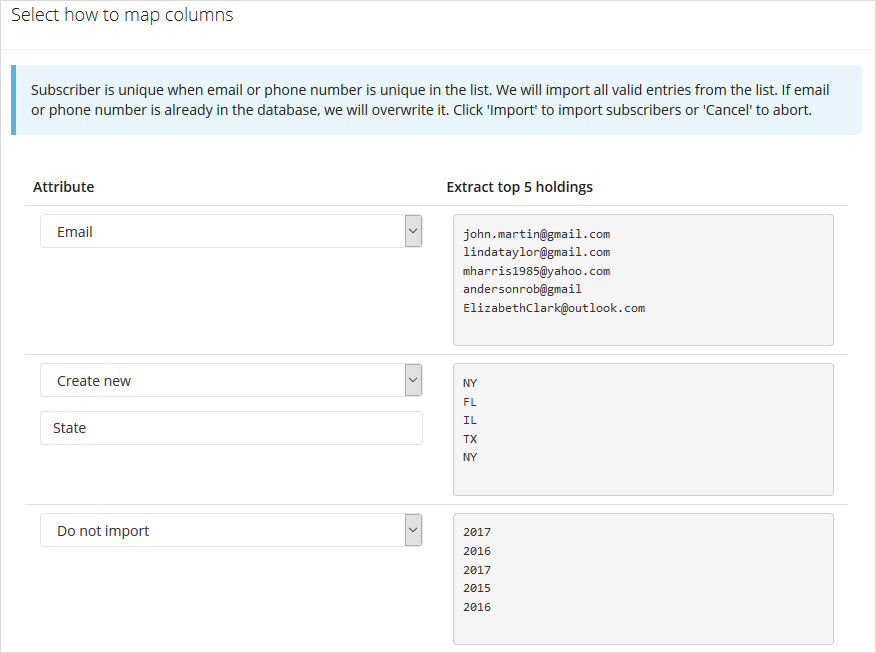
Because the data file you are importing will often contain fields arranged in a different order from the columns in your subscriber list, you have to map them to each other. Simply choose a column name from drop-down list next to each data block. If you want to skip some data and not import it to your subscriber list, leave “Do not import” next to it. On the other hand, if you do want to import a data block that does not have any allocated column in your subscriber list yet, select “Create new” and simply enter a column name you wish to be added to the subscriber list that will contain entries from this data block.
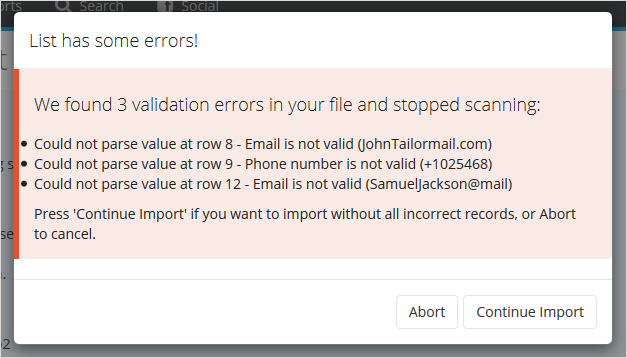
After you finished with mapping, click “Import”. If the file contains any errors, an error message will be displayed.
You can abort subscriber import and correct the mistakes in your subscribers’ data file by clicking “Abort”.
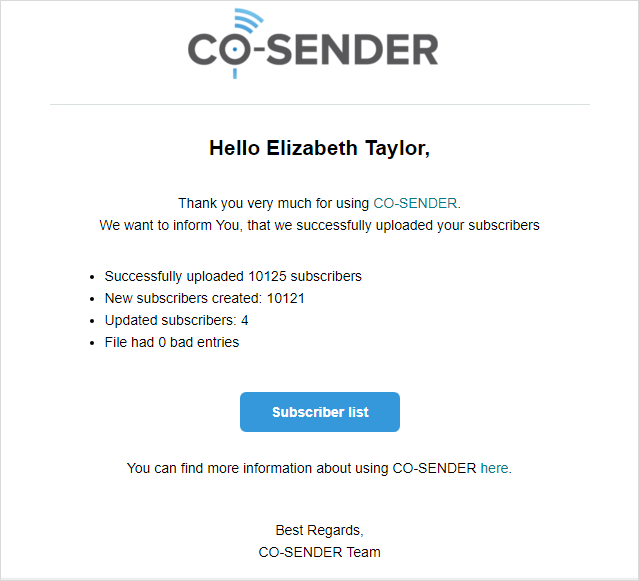
On the other hand, you can select “Continue Import” and import the file anyway, but in this case subscribers with incorrect data won’t be imported to your list. When subscriber importing is complete, you will receive subscriber import confirmation to your email box with the subscriber import results.
Note that instead of updating your subscriber lists periodically yourself, you can choose often a more convenient option of using CO-SENDER provided subscriber sign up form. In this case when someone fills out and submits the form, his or her data will be added to your chosen subscriber list automatically.
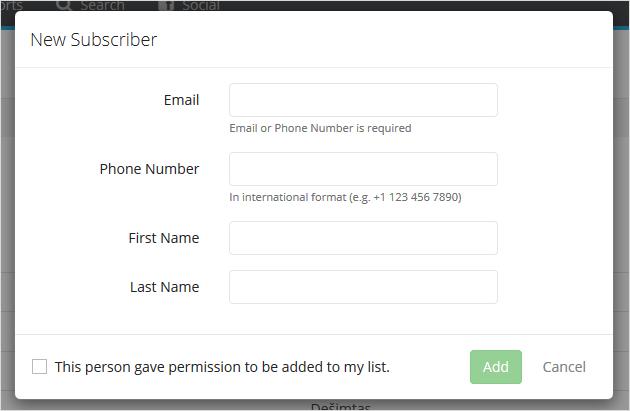
You can add a new subscriber to a subscriber list by first selecting “Subscribers” in the menu and pressing “+ New Subscriber”. A form with subscriber information input fields will appear.
Enter all the information about a subscriber.
Every subscriber should have at least one unique field (Email or phone number).
Creating new subscribers that have the same email or phone number as an existing subscriber will not create a new subscriber, but instead update an existing one with new information.
If you create a new subscriber with both the same email and phone number an existing subscriber, the new subscriber will not be created.
Note that instead of updating your subscriber lists periodically yourself, you can choose often a more convenient option of using CO-SENDER provided subscriber sign up form. In this case when someone fills out and submits the form, his or her data will be added to your chosen subscriber list automatically.
If needed, subscriber entries in a subscriber list can have much more than the 4 main information fields – First Name, Last Name, Phone Number, and Email. To add an additional field to subscriber information, subscriber list must have additional columns defined.
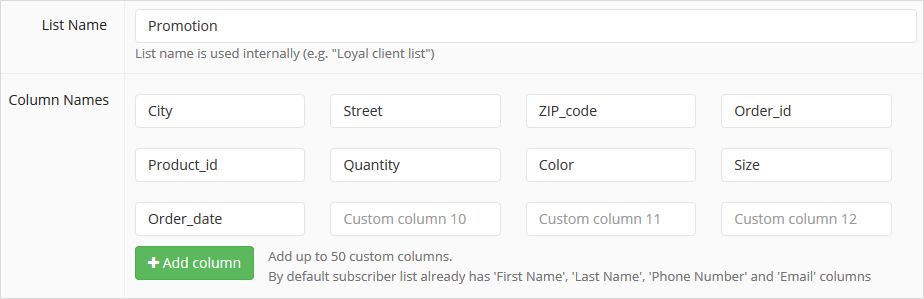
Simply click on “Add column” button and define additional subscriber information you want to be added to the subscriber list. You can do this when creating a new subscriber list or when editing your existing list.
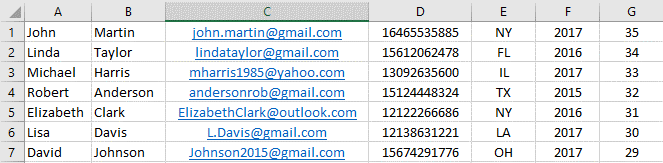
You can add up to 50 custom columns that you will fill in with relevant subscriber information when adding subscribers to your list. This also works when importing subscribers from data file(Excel or CSV), such as this:
When importing subscribers, you will have to map subscriber information with relevant columns in your list. Read more about importing subscribers here.
Subscriber is the communication recipient and a part of a subscriber list. Subscriber list is needed, as it contains list of email addresses or/and phone numbers to which messages will be sent.
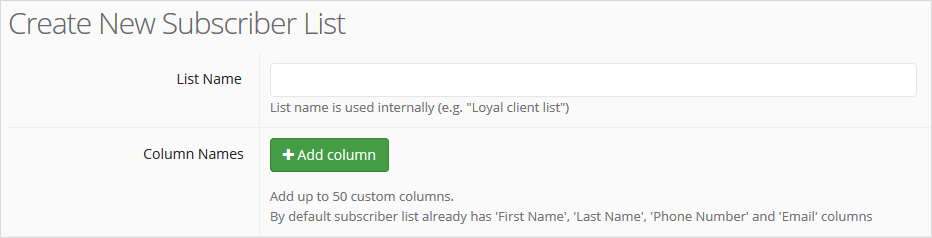
You can create a subscriber list via Subscribers tab or simply by pressing “+Subscriber List” button in the Dashboard. The window, allowing you to create a new subscriber list, will open up:
Enter a name for the new subscriber list.
You can also add up to 50 additional columns for your subscriber list (default four columns are ‘First Name’, ‘Last Name’, ‘Phone Number’, and ‘Email’). Note that you later can use these parameters to be automatically filled in with your subscribers’ information to personalize your message when creating and sending your campaign.
Check default information of the list and edit it as required.
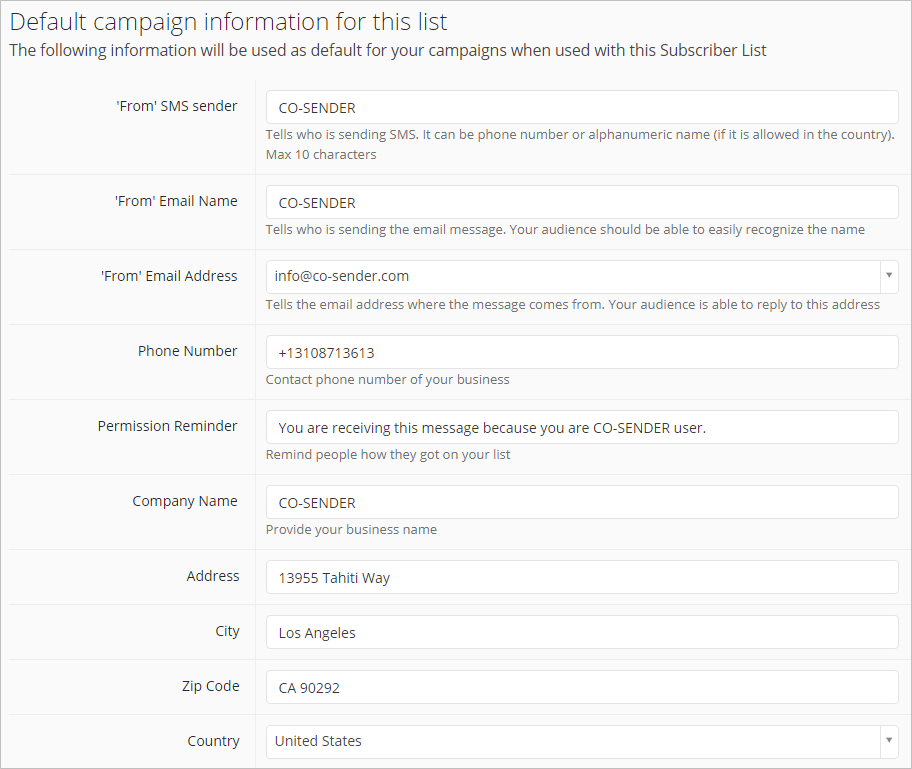
Default campaign information for a subscriber list
All the fields displayed here contain default campaign information and are mandatory to fill in. If your address does not have a zip code, simply enter character ‘ – ‘ instead in the zip code field.
Note that the field “Permission Reminder” is a little notice in your email campaigns that helps your recipients to remember how you got their email addresses. In some cases, it can help prevent you from getting reported or blacklisted as a spammer.
After finished creating your subscriber list, you can start adding actual subscribers to your list manually or simply import them straight from your subscriber data file.
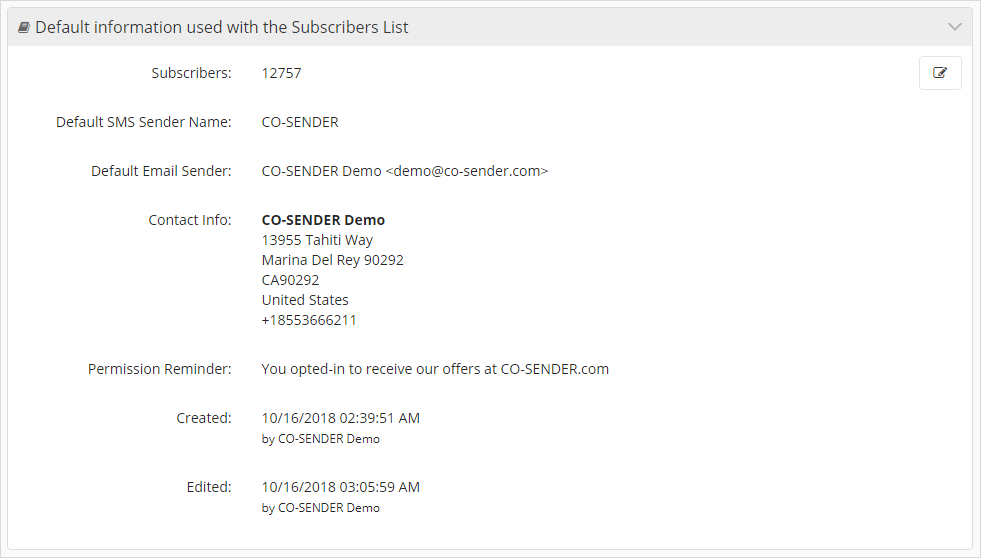
If you ever would need to edit default information for any of your subscriber lists, simply go to the subscriber list, scroll down where the default list information is stored, and click “Edit” icon on the top right.
Don’t forget to save your changes after editing default list information!
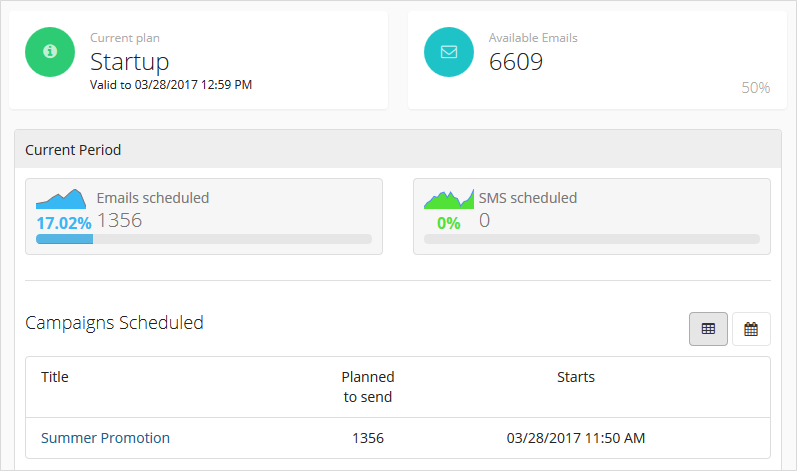
Dashboard is the first screen you see after you login to CO-SENDER, it contains all the basic information. Dashboard also shows a simple tutorial how to use CO-SENDER step by step.
The first thing on the dashboard is your Plan along with the expiration date.
There is also information on how many Emails and SMS messages you can still send with your current and upcoming plan.
You can see current and following plans.
Graphs show scheduled campaigns and number of messages they will need to be completed.